
 If you’ve been a frequent visitor here you’ll know that it’s not uncommon for me to be scrambling at the last moment for a quick and easy Mother’s Day or Father’s Day, or Christmas craft to do with the children.
In fact, it’s not uncommon for the children’s gifts to their parents to be a day or two late.
But this year it was going to be different.
This year I searched for Mother’s Day craft on Pinterest waaaaay ahead of time, and decided we’d make Glass Gem Sun Catchers.
Like always, when I’m looking at Mother’s Day craft ideas I only consider things that I would enjoy getting. Breathe easy, Amy & Kids Co. moms – you’ll never receive a doily corsage to wear on Mother’s Day… Not on my watch anyway.
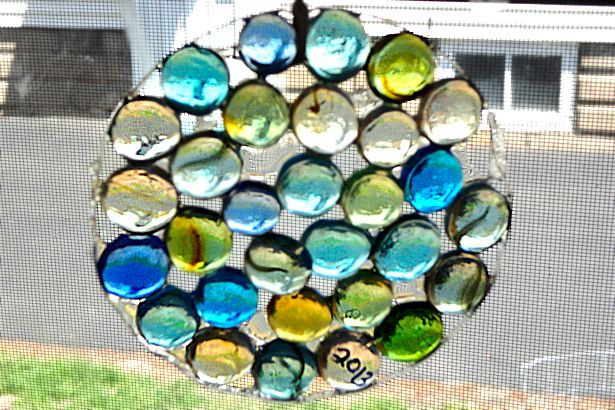
The mother’s day Gem Sun Catcher craft initially caught my eye because the sun catchers are so pretty. And since most of the children are currently obsessed with creating huge lakes of glue whenever they get a chance, I knew the craft would appeal to them too. Finding glass gems at the dollar store was the icing on the cake!
Since I’d decided on a Mother’s Day craft ahead of time and actually gathered all the supplies we’d need thanks to Irish Girl for picking up the glue for us, I was sure that this year our Mother’s Day gifts would be done on time.
Silly me – I should know better! What’s that saying about the best laid plans of mice and men?
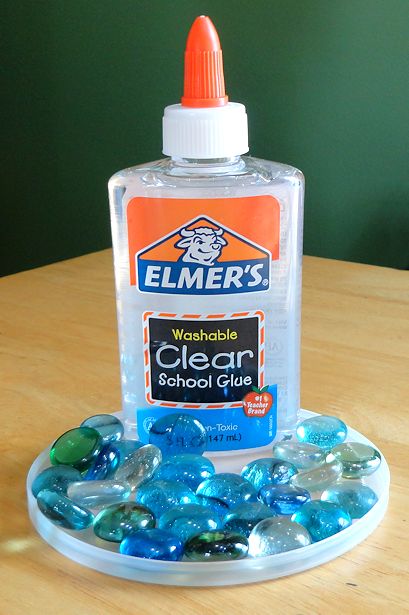
Mother’s Day Glass Gem Sun Catcher Supplies
 Things started out looking good. The Tuesday before Mother’s Day I got out all the supplies:
- Clear Elmer’s glue. Plain Elmer’s doesn’t work as well – it dries cloudy and yellows in the sun.
- Glass gems
- A plastic container lid
- Ribbon, yarn, or fishing line Not pictured.
Then I called the children over to make their Mother’s Day craft.
Mother’s Day Glass Gem Sun Catcher Directions
The glass gem sun catchers were incredibly easy to make; the hardest part was giving the glue plenty of time to dry. The website where I found the directions said to let the glue dry 2-3 days, and we had 4 days. That should be plenty of time, right?
You’d think.
1. Glue
Lay the container lid on the table upside down, so it makes a little tray. Have your child fill the bottom of the lid with glue.
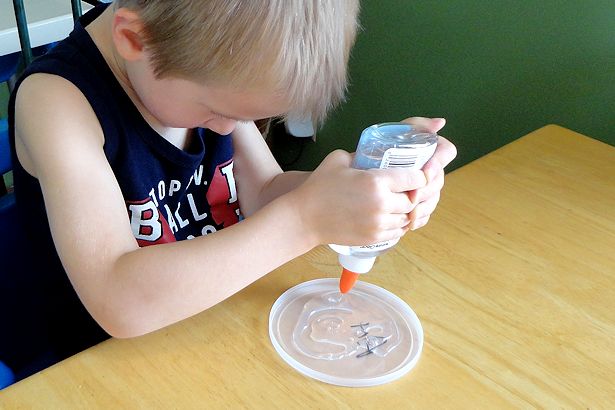 The children LOVED this part until about half-way through when their little hands got tired. I ended up filling in the empty spots for them while they chose their gems.
2. Gems
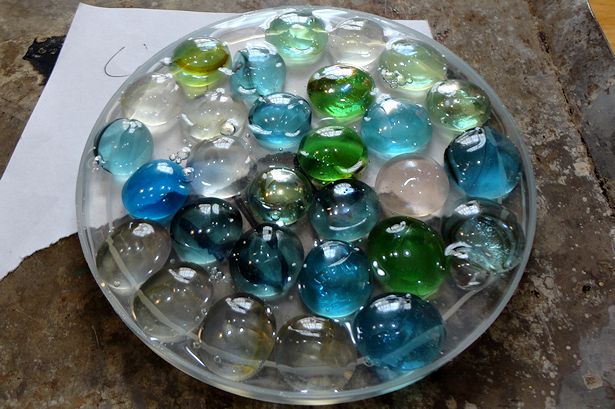
Have the child place glass gems in the glue, flat-side-down, until the lid is full.
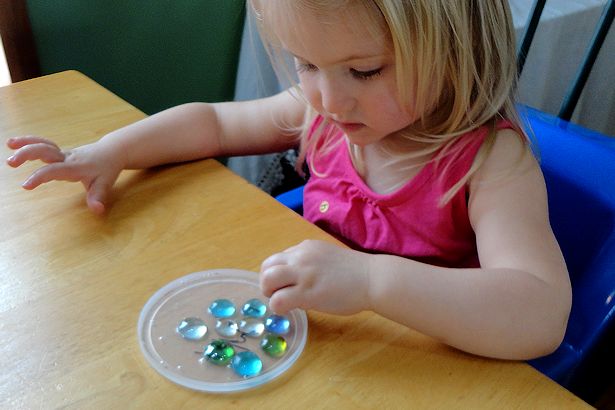 I was curious to see if any of the older ones would create a pattern, but they didn’t. They did pick through the multicolored gems to choose their favorite colors though.
3. More Glue
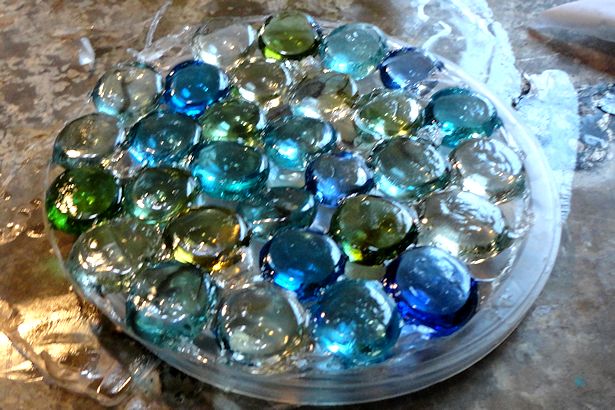
Squeeze more glue on top of the gems so they’ll be nice and secure.
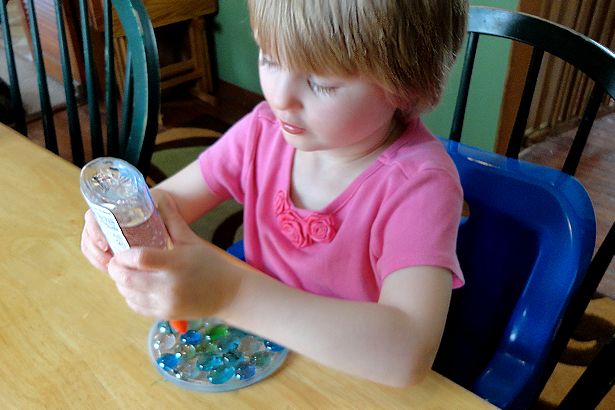 I helped a little with this step too, since their hands were still tired from the first step.
3. Dry
Set the sun catchers aside somewhere to dry, and wait. If you’re making more than one sun catcher remember to label the sun catchers so you know whose is whose!
 This is where we ran into problems. Like I said before, the website where I found the directions for this Mother’s Day craft said to let the sun catchers dry 2-3 days, but ours took more than 4 days to dry. Maybe we used too much glue?
4. Peel
Peel the lid off your sun catcher.
 By Sunday – aka Mother’s Day – evening the sun catchers were dry enough that I could peel them out of the lids, but the bottoms were still gooshy. I laid them bottom-side-up and they finished drying overnight.
5. Hang and Enjoy
Thread the ribbon, yarn or fishing line through a hole between the gems and the glue to hang. You can use suction cups to attach the sun catcher to a window or hang it from the window lock like I did.
All of our sun catchers had holes between the gems except Peanut’s, so I used a scissors to poke a hole in the glue between two gems. Finally I used a Sharpie to write “2013” on one of the gems.
I think this year’s Mother’s Day craft turned out beautifully! I’m just sad that they took so much longer to dry than I expected so they ended up being a day late.
Better late than never though – right?


This is a great idea and I must give this one a try! So, so pretty! Thanks for sharing this idea as I’m sure many of us will follow your directions.
These are so cute and I thought about doing these with my 3rd graders. About how much glue does it take (per child) to do this project?
It depends on how deep your lid is, but we used about 1/3 a bottle of glue for each one.
Thanks for asking!
~Amy Sue
does elmer’s white glue work? or does it have to be the elmers clear glue?????
Hi Shelly,
I think it would have to be clear because regular Elmer’s doesn’t dry totally clear, it’s kind of opaque. I don’t think it would look as good with regular Elmer’s.
~Amy Sue
Would the glue not melt in the sun?
Mine never has, but it’s not in direct sun. I certainly wouldn’t hang it outside!
Has anyone else hung theirs in direct sun? What happened?
Thanks for asking – hopefully someone will answer.
~Amy Sue
I was wondering if anyone has tried this with beads? I have a ton of beads Im not sure what to do with???
I’ll bet it would work great with beads!
If you have pony beads you could also make a melted bead sun catcher. I haven’t tried it yet but it looks really easy – just fill the bottom of a pan with beads then bake at 400 for 25 minutes or so. I’d open a window to help clear out the fumes! (Hmmm… I haven’t picked a Mother’s Day gift for this year yet but you just gave me an idea!)
Thanks for commenting!
~Amy Sue
I have baked pony beads in the oven. I will never do it again. The fumes are horrible. Wonder if it could be done outside on a grill??
Ohhhh, I never considered fumes. Yuck! I don’t know if it would work on a grill, but if you have one where you can control the heat it might work… Let me know how it goes if you try it!
~Amy Sue
Pingback: 15 Fun and Easy Mothers Day Kids Crafts
Made 2 of these so far and love them! So pretty! They did take a few days to dry but so worth it!
Pingback: Mother's Day Craft Ideas for Kids - Metro Parent
where do you get the plastic lids?
Where did you find the plastic lids?
I was given a bag of them from a friend. I have no idea where she got them, but any plastic lid would work.
~Amy Sue
Has anyone tried these and dried them with a hair dryer? I’m thinking this would make a great youth craft event during Sunday service. We would only have about an hour.
Melissa,
Honestly, based on my experience I doubt they’d dry in an hour. But maybe you could put them in a ziplock bag and sent them home to dry.
~Amy Sue
What if you can’t find the gems in colors you want? Do you think watered down paint would work as far as color coming through and not fading?
Shayla,
I don’t think watercolor paint would work, but you might be able to use colored glue instead of clear. Try soaking a marker in the glue for several days to color it, then use that instead of clear glue. The only issue is that when the glue dried it shrank so not all the gems were covered. You may need to let the glue dry, then apply another coat, let it dry, and repeat until the gems are covered in glue.
If you try colored glue, be sure to let me know how it turns out!
~Amy Sue
Ok I figured my mom and I would try this awesome suncatcher. We did them in a square cover and used the flat marbles and 1/3 the clear glue. But we found that the glue shrinks when it dries. So I found myself trying to fill holes with glue after it has sat for over 24 hours. Now here it is 2 days later still not dry and still has holes between marbles. So mom and I decided to fill holes with seed beads and more glue this is really a bit much with Mothers Day around the corner. So I do believe this will take 4 days to dry I think resin is the best way to do this suncatcher not this Elmer Clear School glue.
Karen,
I had the same issue with glue shrinking but I just left the holes. Seed beads is a great idea – I might try that next time! I’ve never worked with resin, but maybe that’s worth a try next time.
Thanks for the ideas!
~Amy Sue
Pingback: FoodHomeLifeStyle Five Adorable Mother’s Day Crafts You Can Make with Your Kids - FoodHomeLifeStyle
Has anyone thought of using modge podge, instead of the glue?
If so, how did it turn out?
That’s a great idea! I’m curious to know if anyone’s tried it too.
~Amy Sue
I’ve made several of these in all sizes and love them! I use the Aleene’s Original Clear Gel Tacky Glue! I’ve also learned that you don’t have to make sure that the beads are all covered thick with the glue. And this glue holds them together great! I use the plastic lid from a Cool Whip container! I’ve used the lid from an old Cookie Tin to make the bigger ones! the less glue you use, the lighter they are and they dry a lot faster! Also, put them out in the sun to dry! Love this idea! I even strung beads and form the glass like clouds and strung crystal beads from it that looked just like rain drops falling and put a bell on the end so when you open the door it would ding! Thank you for letting me share!
Beth,
Thanks for sharing! Those sound beautiful, and thanks for the tip about the glue. I’ll have to try Aleene’s next time.
~Amy Sue
Pingback: Silver DIY for the Weekend – Suncatchers – The Silver Diaries
Do you think these would work using a tin foil round bowl? It’s a little tin foil bowl like you get pasta in from Domino’s Pizza.
Sarah,
I think it would work fine too, but I haven’t tried it in a foil bowl. My concern is that they might be hard to get out, but you could always rip the bowl off the back. Good luck, and let me know how it goes!
~Amy Sue
Could these be used as coasters and if so for hot drinks? Also, would the glue (even though dried of course) damage wood tables?
I wouldn’t use them as coasters because I’d worry that wetness or heat would cause the glue to dissolve. Also, it’s kind of hard to tell from the photo, but there are open places where the glue pulled toward the stones so wetness would go through to the table anyway.
One coaster idea from when I was a kid is to cover the bottom of a plastic lid with glue then spiral yarn around and around, from the middle out, filling the lid. Let dry and keep in the lid. We just used Elmer’s but I don’t remember if moisture dissolved it or not. Actually, I can’t remember if anyone we gave them to actually used them, or just had them out “for show.” 😀
Another coaster idea is to decorate a ceramic bathroom tile with Sharpie, spray with clear coat, then hot glue felt squares to the bottom. Just be careful not to scrape the cups/mugs across the tile because the clear coat and Sharpie will scratch off.
Let me know if you try any of these ideas!
~Amy Sue 🙂
Love this craft and have done it a few years with various groups. Recently did this with the Senior Center in my town and they loved it. Great way to have them make something cute and use those motor skills. Rather than lids, I used clear planter bases, plastic ones I found at the dollar store and big chain stores. It took a bit longer for the glue to dry as I used a bit more than if I had used lids but they came out wonderful! I get to deliver them soon to the seniors.