
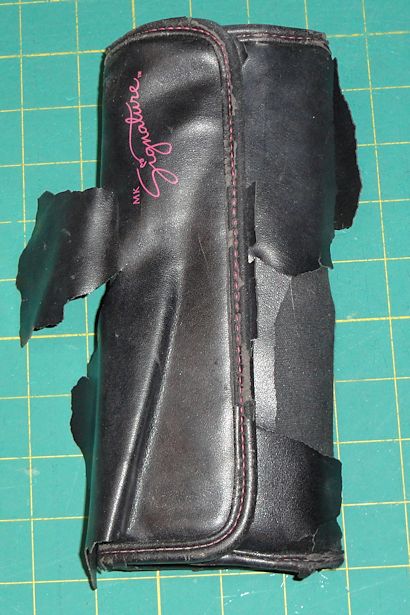
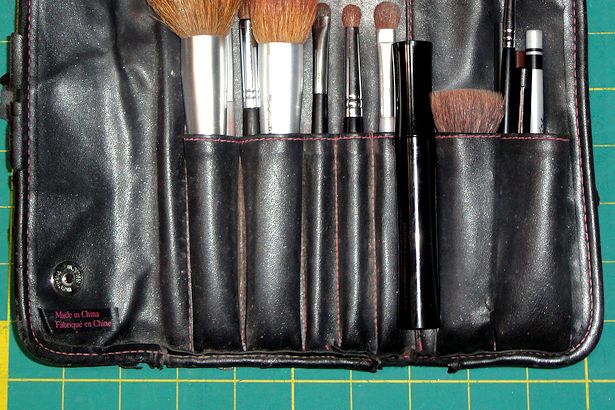
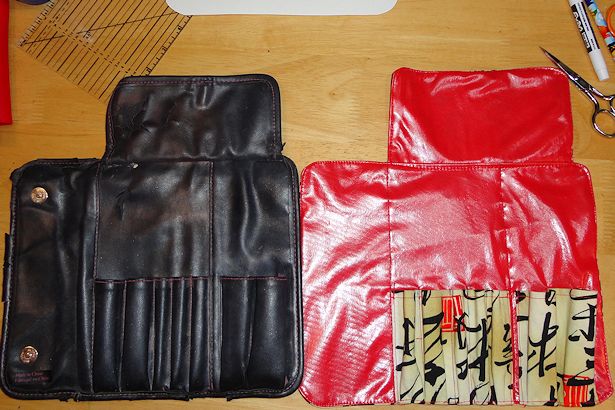
My poor Mary Kay makeup brush roll – you’ve obviously seen better days. To be blunt, you’re looking downright shabby.
But I love you so much, how can I just get rid of you? You’re the perfect size and shape for my makeup brushes… I’ll never find another makeup brush roll as perfect as you.
Wait… I don’t have to find a new makeup brush roll as perfect as my old one; I can use it as a pattern to make a new one.
Eureka!!
Make a Makeup Brush Roll – DIY
If you’re in the same boat with a makeup brush roll that has seen better days, you can use the following steps to make a new one exactly like the one you have. Just ignore my measurements and use your own! For those of you who are starting from scratch I’ve included the measurements so you can make one like mine.
Disclaimer: This is NOT the easiest way to make a makeup brush roll; proceed with caution and keep a stash of emergency chocolate on hand… just in case.
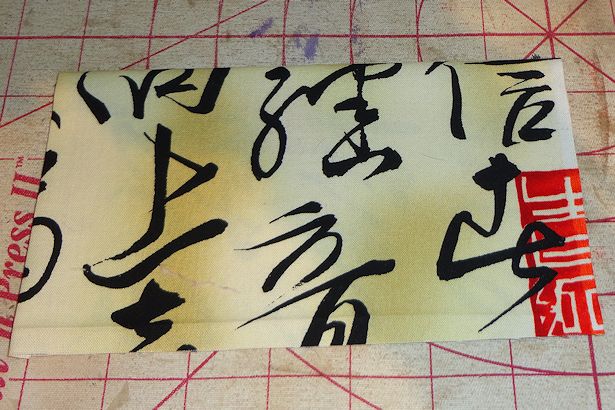
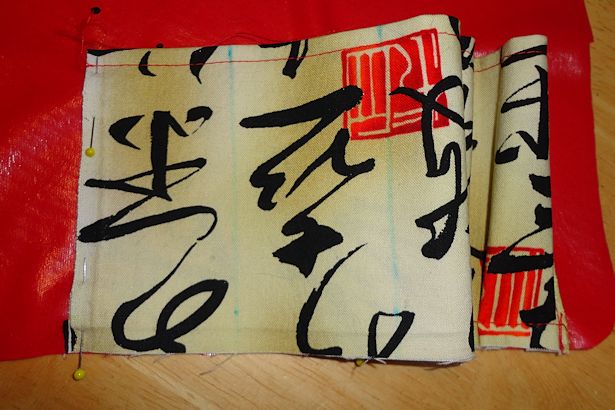
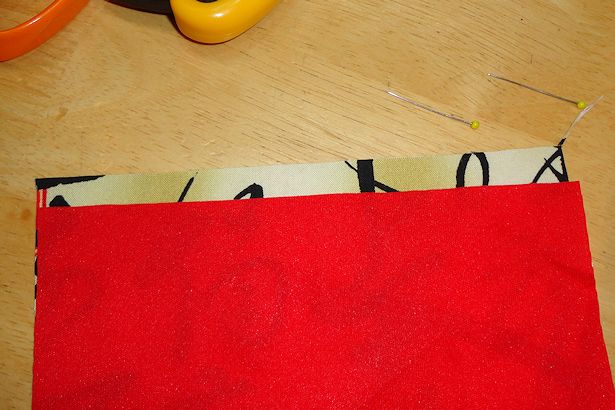 First I chose fabric from my stash. For my new makeup brush roll I decided to use a Kanji print cotton fabric on the outside and red PUL on the inside. PUL means Polyurethane laminate and it’s a popular cloth diaper fabric because it’s thin, flexible, soft, and waterproof.
Because I decided to use the PUL shiny-side-in so it wouldn’t get dingy leftover makeup on the brushes I had to remember to keep the fabric with both “right” sides facing the same way.
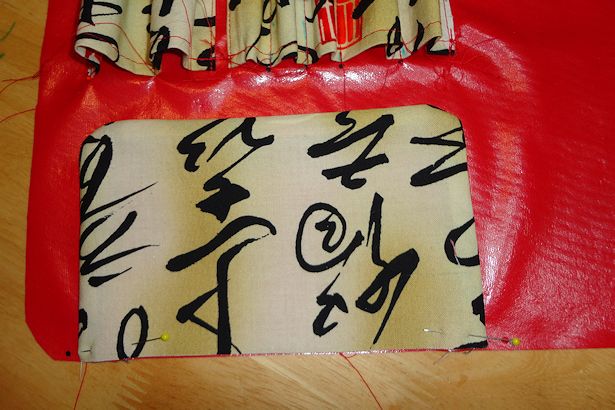
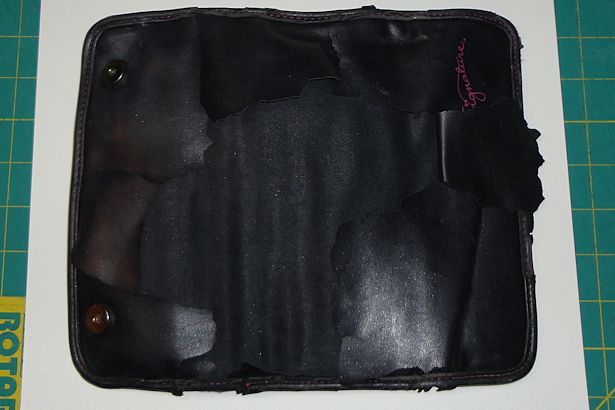 I started by making a pattern for the back of the makeup brush roll by placing the makeup brush roll face down on a large piece of paper and tracing around the outside with a pencil.
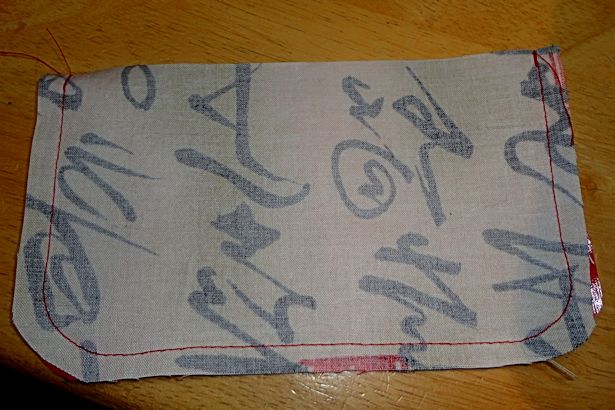
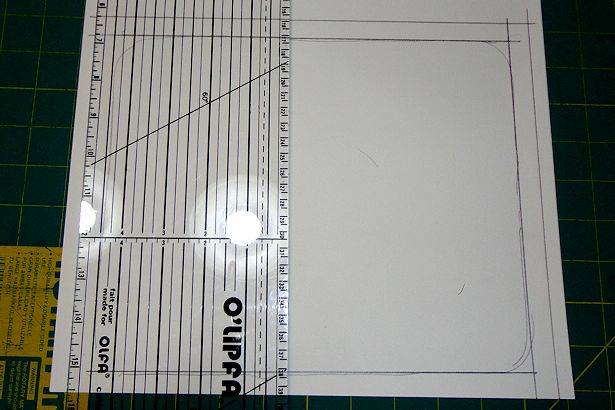 I used my rotary mat ruler to straighten the traced lines, but you can use a regular ruler. Then I added a seam allowance by drawing another line 1/4″ outside of the straightened lines.
Ignore the rounded corners; I drew them before I remembered to add the seam allowance. Whoops!
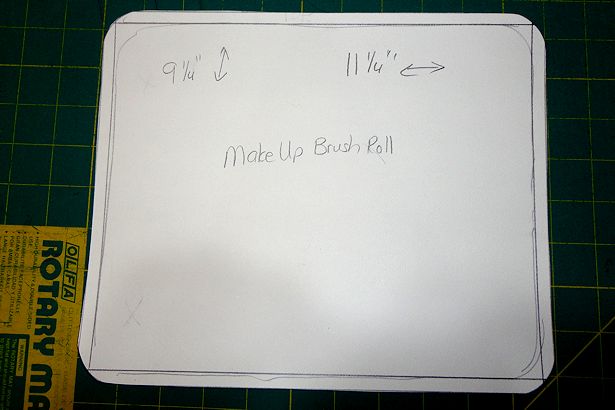 Next I cut along the outer lines. To make the rounded corners I traced the bottom of a cup, but if you’re a better cutter than I am you can freehand it.
You can see the finished dimensions of my piece are 9 1/4″ x 11 1/4″ – it was 9″ x 11″ before I added the seam allowance.
Lay your outer and inner fabrics wrong-side-together, place the pattern on top, and cut one piece from both layers of fabric.
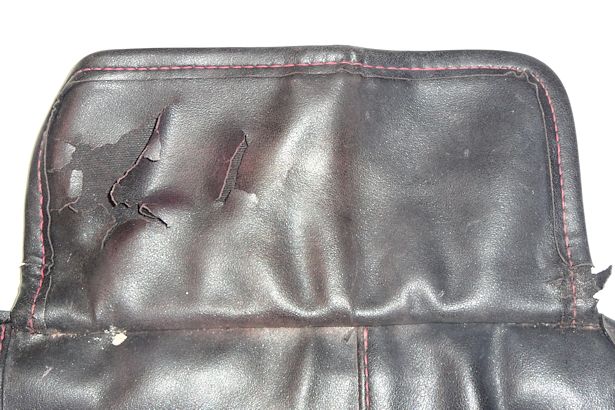 My old makeup brush roll has a flap that folds down over the brush bristles to protect them.
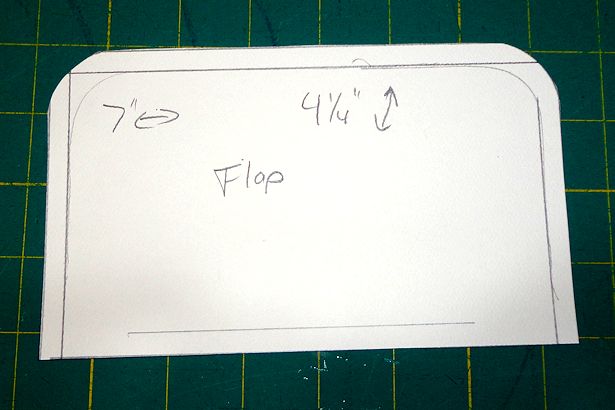 I repeated the steps above to make a pattern for the flap. You can see the dimensions with seam allowance are 7″ x 4 1/4″.
Again, lay your outer and inner fabrics wrong-side-together, place the pattern on top, and cut one piece from both layers of fabric.
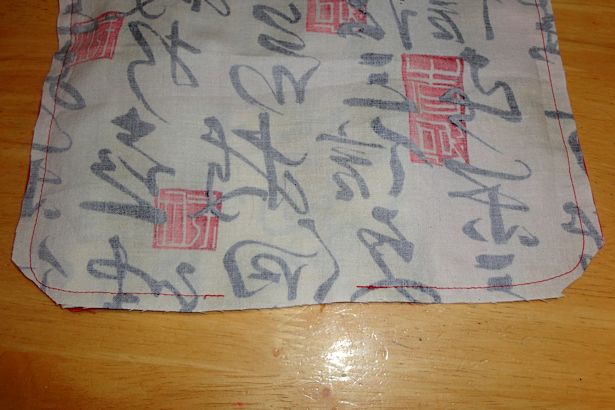
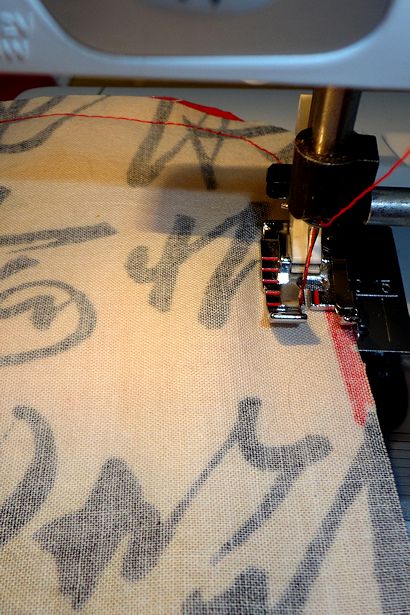 First I sewed around the outer edge of the flap.
 I left the long straight edge open so to turn the flap right-side-in.
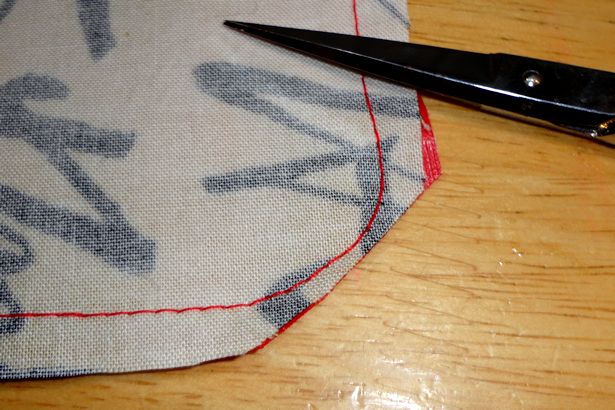 Before turning it right-side-in I trimmed the corners close to the stitching so the extra fabric wouldn’t bunch up and make the corners all lumpy. Be careful not to cut the stitching.
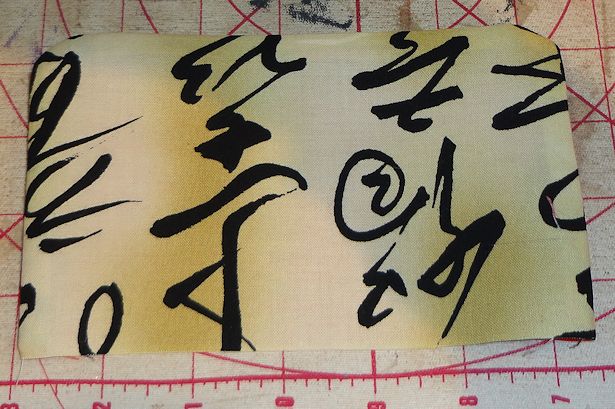 Then I turned the flap right-side-out and pressed it.
This is where it starts to get tricky…
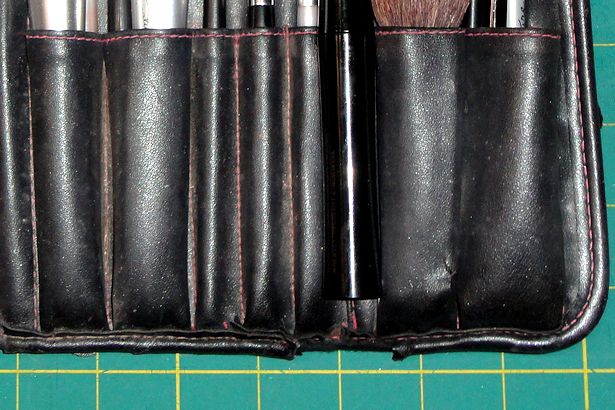
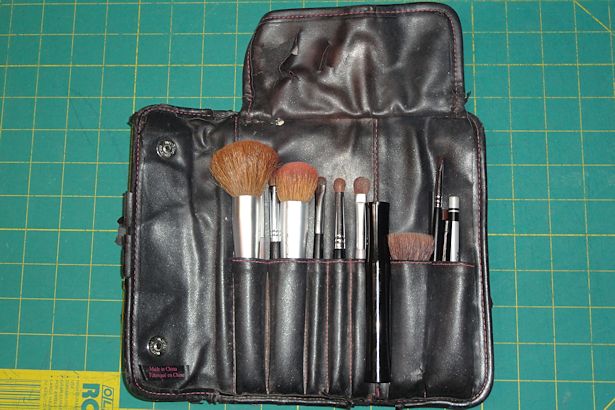 My makeup brush roll is divided into three main sections: the left section has no pockets, the middle section has two big pockets and three little pockets, and the right section has two big pockets.
There’s topstitching running from top to bottom in between each section. I’m not sure why the makeup brush roll is constructed this way but I suspect it’s to help it lie nicely when rolled up. In any case I figured that Mary Kay knew what they were doing when they chose this design so I’m going to do mine the same way.
 To make the pockets, the first thing I did was measure the height of the pockets in my old makeup brush roll. Then I added 1/4″ seam allowance, ending up with a total height of 4 1/4″.
I decided to use two layers of fabric for the pockets so they wouldn’t be floppy, and so I would’t have to hem the top edge. So I multiplied the pocket height by 2; giving me a final height of 8 1/2″.
Getting the width measurement wasn’t as easy. Since the pockets aren’t flat I couldn’t just cut the pocket the same width as the outer layer – there wouldn’t be enough width to make the pockets “pop” out from the back. Don’t you just love my technical terms?
In order to get the right width I measured up and down the “hills and valleys” of each pocket section, then added 1/4″ to each side for the seam allowance. The final widths for each pocket section are:
– Right section; 5 1/2″
– Middle section; 7 3/4″
I wanted my pockets to contrast with the solid PUL inside fabric and I know what a pain in the $@#& PUL is to work with so I cut my pocket sections from the Kanji print I had picked for the outside of the makeup brush roll.
The dimensions I cut the pocket sections are:
– Right section; 8 1/2″ x 5 1/2″
– Middle section; 8 1/2″ x 7 3/4″
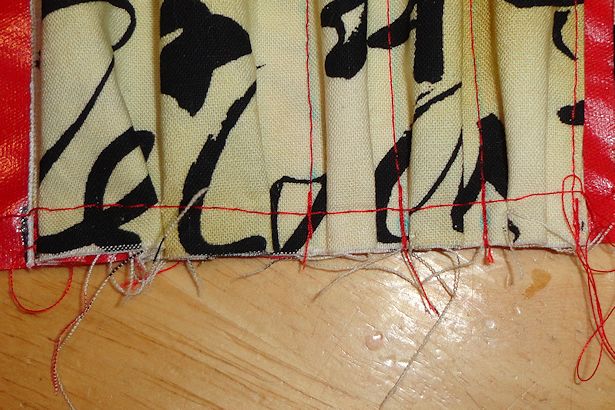
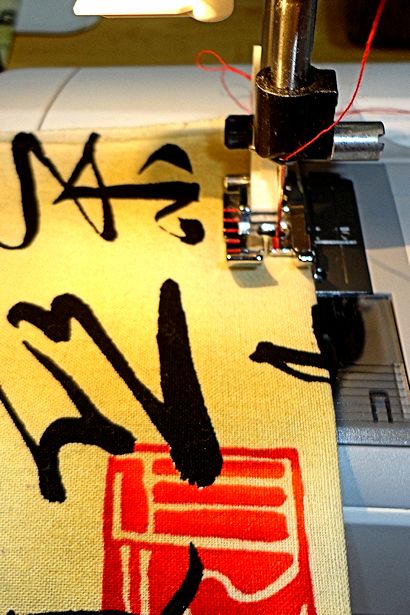 After cutting I folded each pocket section in half right-sides-together and stitched the side seams. Then I turned each section right-side-out, pressed them lightly, and top stitched 1/4″ from the top.
Now comes the tricky part…
I know I said that already; there’s more than one tricky part. That’s why I suggested you have chocolate on hand.
 The pockets in each section are made from one piece of fabric that was stitched to the inner fabric on both sides and at intervals along the middle.
I decided to make the pockets on the right side of the makeup brush roll first because there are just two of them, so if I messed up I’d have less ripping out to do. First I measured the entire pocket section from outer stitch line to outer stitch line. It measured a little over 2″.
Then I measured each pocket from stitching line to stitching line; both pockets measured 1″.
Finally I measured from the outer edge on the right to where the pocket section began so I’d know where to place the pockets on the inner fabric. That measurement was about 3/4″.
Remember back in the first step when we added 1/4″ seam allowance to the first pattern we made? Because we added that 1/4″ to the inner fabric we now need to add 1/4″ to the 3/4″ measurement above so the pockets will be in the right place. If you don’t add the extra 1/4″ the pockets will be 1/4″ closer to the edge and there will be an extra 1/4″ between the right and middle sections.
Obviously if you’re making a pattern from your own makeup brush roll you’ll want to use your own measurements.
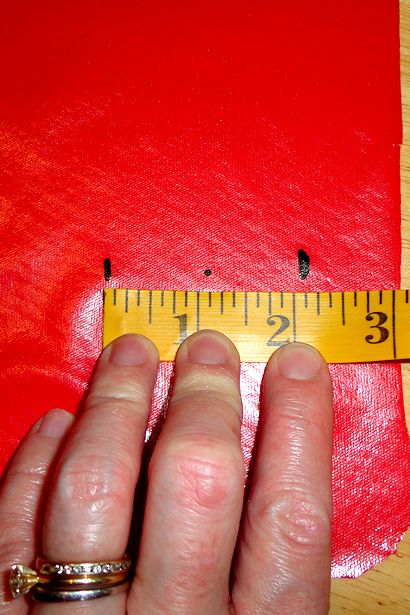 With my inner back fabric right-side-up I measured 1″ from the edge and made a mark. In the last step we measured 3/4″ then added 1/4″ to get 1″. Then I made two more marks, each 1″ to the left of the previous mark. I’m not sure why my marks in the photo are a bit off… It’s not rocket science though; 1/8″ here and there won’t hurt anything.
Water soluble pens don’t work on PUL and Sharpie wipes off PUL so I used a Sharpie, but you’ll probably want to use a water soluble pen.
 Before pinning the pocket section to the inner fabric, fold the pocket section in half width-wise and make a small mark at the bottom of the fabric. If you want perfectly straight stitching lines you may want to draw a line exactly in the middle of the pocket section all the way from the bottom to the top. I forgot to mark my fabric so I had to unpin it, mark it, then repin it again; that’s why there’s no mark in this photo. Whoops again!
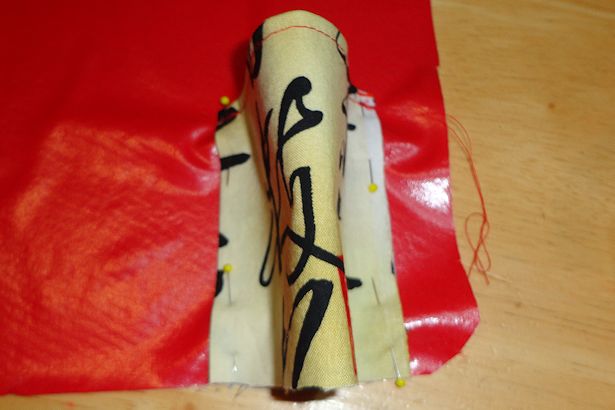
I lined up the side seams of the pocket section and the outer two marks on the PUL, making sure to keep the bottom edges of both fabrics even. As you can see, the pocket fabric “popped” up in the middle.
 Next I lined up the mark in the middle of the pocket fabric and the mark on the outer fabric, then pinned.
 I stitched each side close to the edge of the pocket section, then stitched straight up the middle. Since the makeup brush roll is just for me I didn’t draw a stitching line; I don’t care if the stitching isn’t perfectly straight.
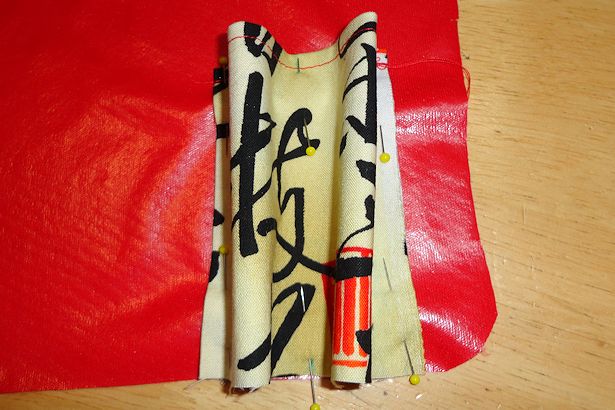
 Now it’s time to make the darts that cause the pocket sections to lie flat at the bottom. I smoothed the fabric of each “hill” together until it met in about the center, then I pinned each side to the PUL.
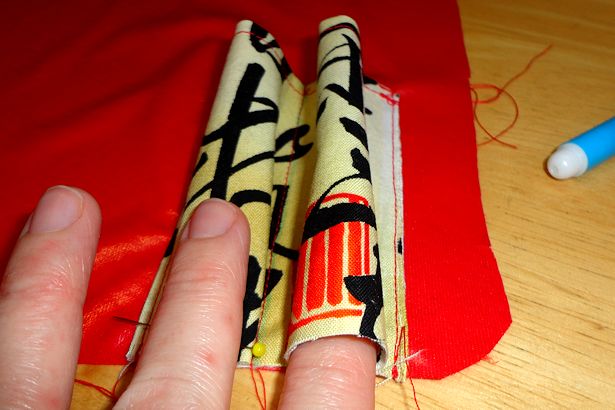 This step is kind of hard to describe; I hope you can visualize it from the photos!
I put my finger inside each “hill” and pressed down on the pinned folds to hold them in place.
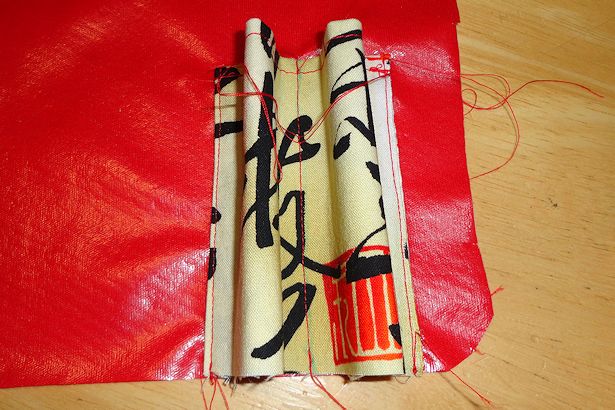
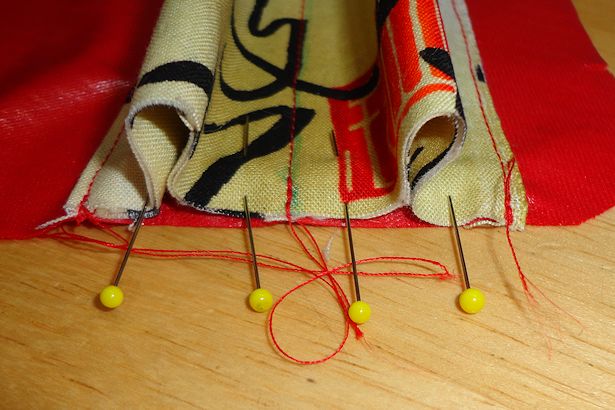
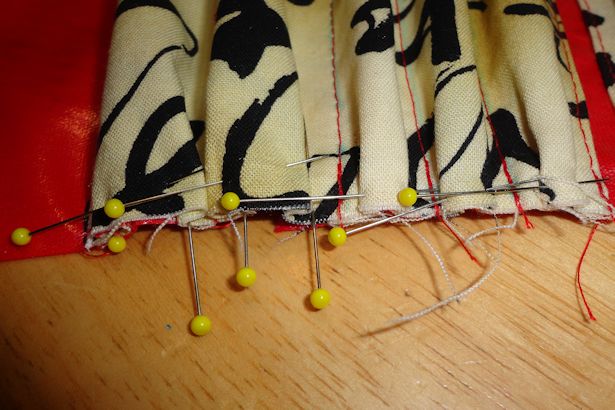
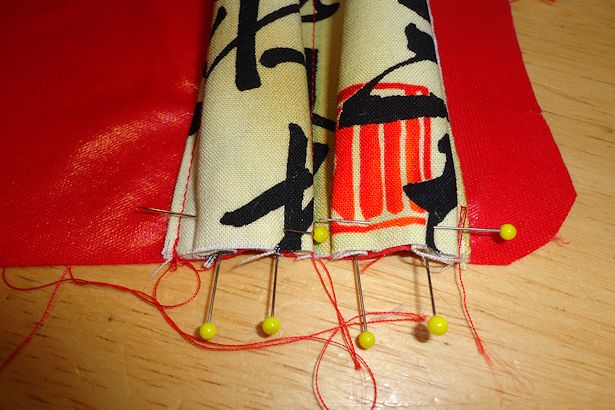 Using my other hand I pushed down on the center of the “hill” to flatten it, and pulled my finger out at the same time. Then I pinned the flattened fabric in place.
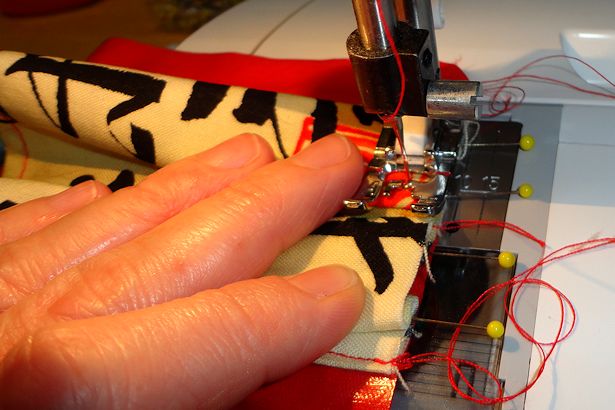 With a long basting stitch I carefully stitched 1/4″ from the raw edges; pulling the pins out at the last minute while making sure not to hit them with the needle.
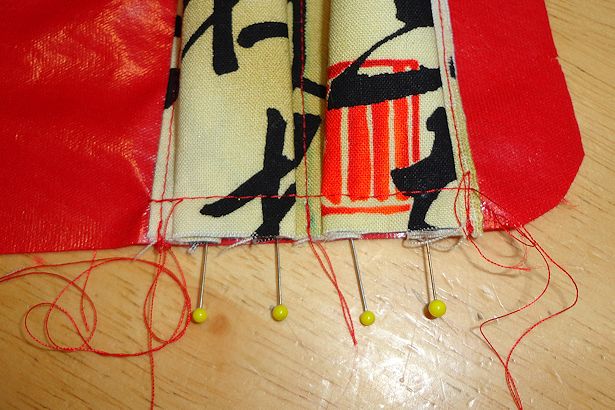 Not too shabby, if I say so myself!
This pocket section was relatively easy because each pocket was the same size. The middle section is tricker because the pockets are different sizes.
Now would be a good time to break for some chocolate; just let me know when you’re ready to continue.
Whoa, that was fast! Let me finish my chocolate… Just a sec… One more bite… … … OK, now I’m ready.
 I started the middle pocket section just like the right one; by first measuring the entire pocket section from outer stitch line to outer stitch line. It measured about 4″.
Then I measured each pocket from stitching line to stitching line. The two big pockets on the left measured 1″ each, just like the two pockets on the right side. The three smaller pockets in the middle section measured about 5/8″ each.
Next I had to figure out where to place the pockets on the inner fabric, but since the middle pockets were right next to the right pockets it was pretty easy; there was just 1/4″ between them. I made a mark on the PUL 1/4″ to the left of the right pocket section with my handy-dandy Sharpie, then made another mark about 4″ to the left of the first mark. This is where the left side of the pocket section should be.
Starting back at the first mark, I made three marks; each 5/8″ to the left of the previous mark so I’d know where to stitch the small pockets. Next I made 2 more marks, each 1″ from the previous mark so I’d know where to stitch the big pockets.
Got that? Let’s double-check… Going from LEFT to RIGHT you should have something that looks kind of like this:
| 1″ | 1″ | 5/8″ | 5/8″ | 5/8″ |
This is where you’ll want to do your own measuring if you’re using your own makeup brush roll as a pattern.
 Next I had to measure the “hills” of each pocket so I’d know where to put the marks on the pocket section. Since the right pocket section only had 2 pockets I could just fold it in half to get our stitching line, but the middle section has 5 pockets so I had to measure each pocket.
The two big pockets measured about 2″ each, so I drew two stitching lines on the pocket section; one 2″ from the left edge and the second 2″ from the first. Rather than try to measure the small pockets I decided to divide the remaining pocket section into 3 equal parts. I measured, divided by 3, and ended up with a little over 1″ for each pocket. Of course. It couldn’t have been 1″ exactly; that would be too easy!I drew three lines about 1″ apart across the rest of the fabric. It’s not rocket science, remember?
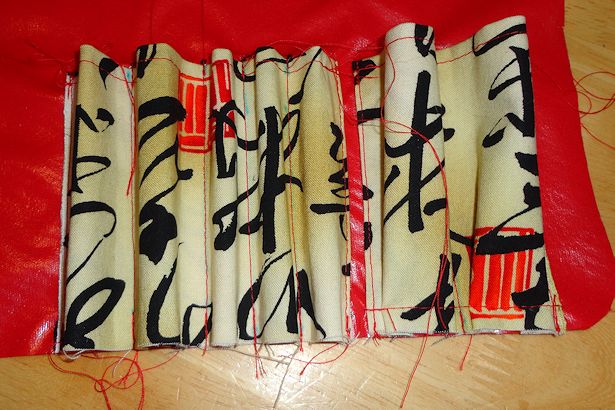 Just like on the right section I started by matching the outermost edges to the outermost marks and pinning. Then I matched the other marks, pinned, and stitched along the lines to form the pockets.
 Then I made the darts for the two big pockets just like I’d done on the right section pockets. The smaller pockets were harder, so I ended up folding the fabric in with the index fingers of both hands at the same time, then squishing the center down with my left thumb and holding it down so I could pin it with my right hand. It wasn’t pretty but it worked. Don’t feel like you have to use my sorry technique – you make those darts anyway you can!
 Using a long stitch I basted along the bottom edge of the darts, just like before.
Whew, that was a lot of hard work! How about a chocolate break?
No?
Are you sure?
Just a little…?
OK. *sigh* We’ll keep going and save the chocolate for when we’re done.
 Headed into the home stretch… I measured where the flap on my old makeup brush roll was positioned, then made a corresponding mark on the PUL, remembering to add 1/4″ for the seam allowance. Then I laid the flap on the PUL, pinned it, and basted it with a long stitch.
 Looking pretty good so far!
To finish the makeup brush roll I pinned the Kanji outer fabric and inner PUL fabric with pockets – right-sides together.
 Starting at the flap, I stitched all the way around the edge, ending about 3″ from where I started.
 It’s almost done! I trimmed the corners like I’d done with the flap at the very beginning of the project.
Then I carefully turned the makeup brush roll right-side out through the opening in the seam, making sure that the corners were fully pushed out and pretty.
 I topstitched the flap near the edge, beginning and ending where the flap was sewn to the body of the makeup brush roll. Then I topstitched around the whole makeupbrush roll. Before stitching over the opening I’d left for turning I made sure the seam allowance was turned to the inside and looked nice.
Finally I drew stitching lines from the top to the bottom of the roll at the left side of the pocket section and in between the middle and right sections. I topstitched those lines and was done! Well, 99% done…
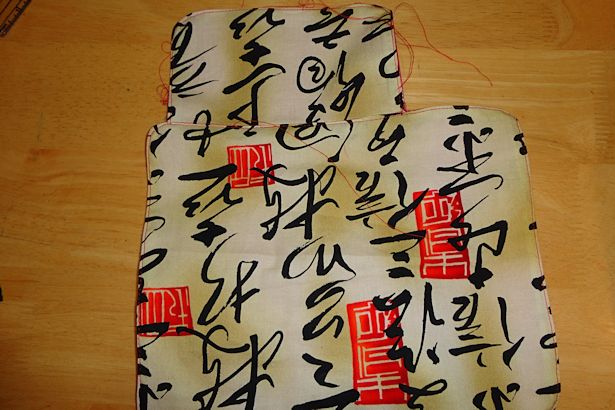
 I think the new makeup brush roll looks as nice as the old one; what do you think?
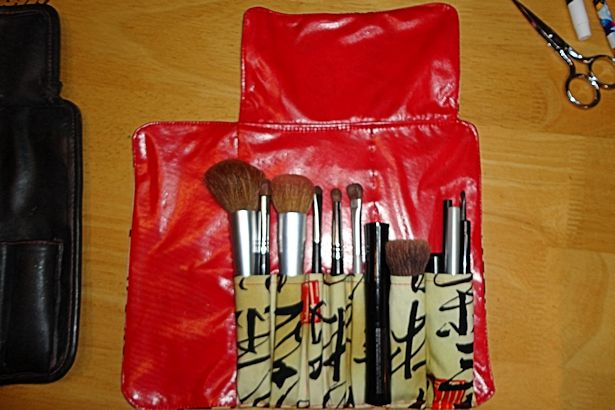 It fits my makeup brushes, eye liners and mascara just as well as the old one too.
To close, fold the flap down to protect the brush bristles, fold the right section in, then the left section.
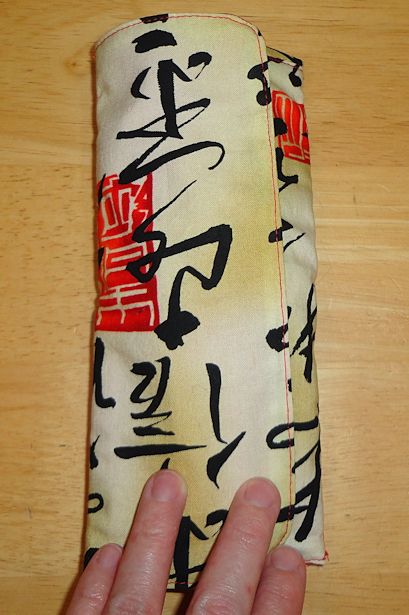 The old makeup brush roll had a magnetic snap closure, but I haven’t decided how I want to close mine yet. Hence the “99% done” comment. I’m debating between red KAM snaps, like I use on diapers, or a red ribbon.
What’s your vote: snaps or ribbon?


I vote red ribbon!
Sounds like you… Do you have any? I used all of mine at Christmas and didn’t think to buy more when I was at JoAnns last weekend. 😉
I vote snaps!