
As you probably know by now, I’m a do-it-myself sort of gal, so when reusable snack bags hit my radar I thought “I can do that! But how do I make it better?
My biggest challenge was the closure. I wasn’t thrilled with snapping bags because Z-Man has a hard time with snaps, and since I’m a mean mom who makes him pack his own lunch he has to have bag he can use by himself. Another concern with snap closures that not many home sewing mamas have a snap press or access to one so they couldn’t make a snapped bag. Nope – snaps were definitely out.
Velcro is another popular closure option for reusable snack bags, but I wasn’t thrilled with it either. First of all, it’s stiff and would be scratchy on the inside. Secondly, velcro attract everything – like lint, crumbs, and other yuckies I don’t want near my kids’ food. But the deciding factor was imagining the boys opening a velcro bag in church: RRRRRIIIIPPPP!!! Talk about public humiliation!
One by one I eliminated several other options: drawstrings don’t close tightly enough for raisins or cheddar bunnies, zippers could have crumb issues, buttons are just dumb… Then I had a brainstorm – plastic sandwich bags!
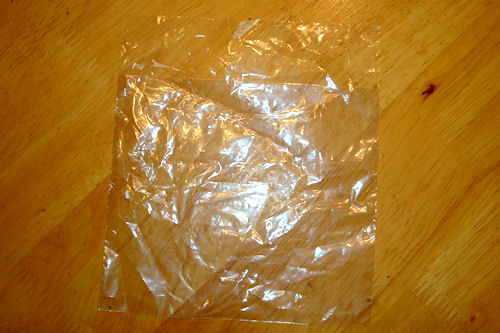 Old fashioned plastic sandwich bags don’t have any closure, and since they’ve been around forever I figured they must have gotten something right. I grabbed a bag from the cupboard and gave it a thorough inspection.
After just one so-so attempt I figured it out, so without further ado I present:
Drumroll please…
How to Make a Reusable Snack (or Sandwich) Bag: The Tutorial
“*scattered applause*
Supplies to Make Reusable Snack Bags
- PUL*, nylon, or other waterproof fabric if you want a waterproof layer.
- Cotton fabric for the lining.
- Thread.
- Serger or sewing machine. I used my serger but you could get a similar effect by using an overcast stitch on your sewing machine, or even a zig-zag if you don’t have an overcast stitch.
*PUL hasn’t been approved by the FDA for use with food, which is why I lined my bags with cotton. You could use two layers of cotton or a layer of fleece instead of the PUL if you wish.
Make a Reusable Snack Bag – Step by Step
“By the way, you can also make reusable sandwich bags using the same technique; just cut your fabrics bigger than you would for a reusable snack bag.” Thank you, Captain Obvious, for that public service announcement.
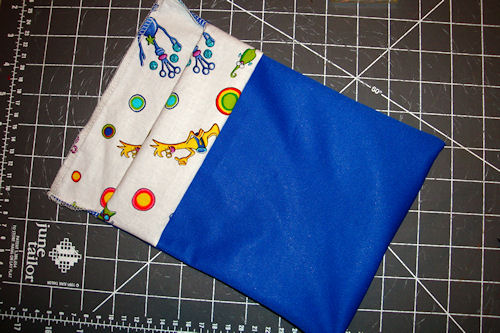
Step 1: Cutting out the Pieces
 The cheapie plastic sandwich bags we had measured 6 1/5″ wide and 7 1/5″ tall, but I’d noticed that they were too small for our bread-machine sandwiches so I wanted to make my bags bigger. I’d made a huge chart of common sizes for reusable sandwich and snack bags and had planned to figure out my measurements mathematically, but that was too much work so I decided to just wing it.
For reusable sandwich bags I cut both fabrics about 7.5″ wide, then I cut the PUL about 20 1/4″ long and the cotton lining fabric about 20 3/4″ to 21″ long.
For reusable snack bags I cut both fabrics about 6 1/5″ wide, then the PUL about 16 1/4″ and the cotton lining fabric about 16 3/4″ to 17″ long. Yes, there’s a reason why the cotton lining fabric is longer than the PUL – it’s coming up next.
 With right sides together, lay the cotton on top of the PUL, aligning the edges as well as you can. Pin along one of the short sides and serge. You may notice that my fabrics don’t line up perfectly on the right side – that’s the beauty of sewing for yourself, it doesn’t have to be perfect. Besides, the serger trims off that little edge so I don’t stress about cutting perfectly.
2. Create the Folding Pocket Closure
 Open the fabrics and flip the lining piece over the serged seam so the fabrics are wrong-sides-together. Line up the short edge opposite from the seam and pin along that edge. The right sides of both the outer and lining fabrics should be facing out. Don’t worry about what the seam is doing right now; it’s probably not lining up the way you expect, but that’s OK.
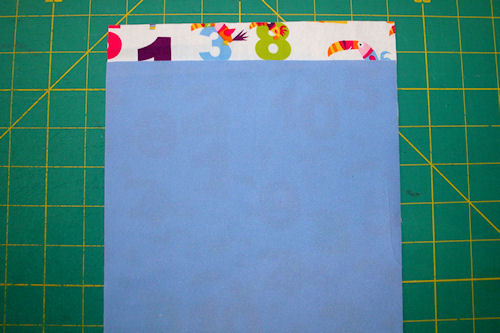
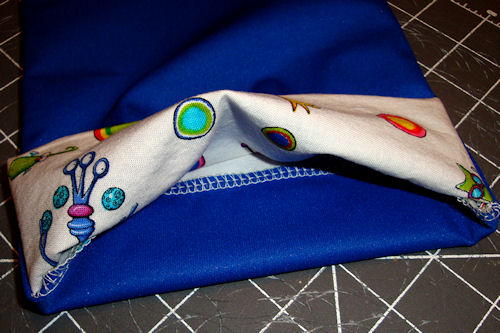
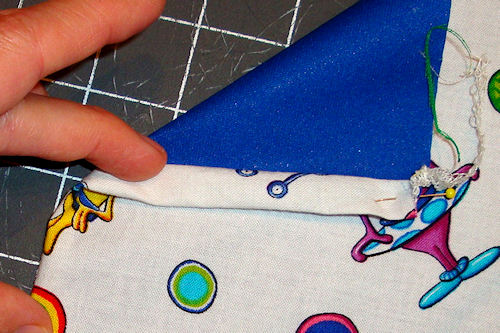 Smooth the fabric from the pinned edge to the seamed edge. The seam will not line up equally; a little of the lining should show on the PUL half, and will create a little decorative element on the finished bag. Look at the folded-down edge in the photo – see how the lining makes a little border? That’s what you want it to do. You can finger press the cotton so it has a bit of a crease, but don’t use your iron on the PUL – the shiny sides may fuse together and then you’d be in a real pickle.
Creating the “pocket” closure is a bit tricky – think about how the top of a plastic bag is put together… that’s what we’re trying to do.
First fold the bag in half outsides-together with the serged and pinned edges even; serged layer on top and pinned layer on bottom.
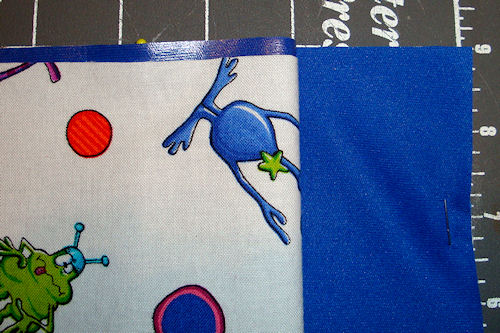 Next, fold the serged layer to the inside and pin along the top so it doesn’t unfold on you. I place the fold about 2″ from the raw edge of the other layer; I think it’s easier to measure that way than try to measure the folded part. In this photo you can see the “pocket” part is folded to the inside.
 This is what it should look like. Now pin up the sides and you’re ready to serge the sides and top.
You’re almost done!
3. Stitching the Sides
Starting at the bottom fold on one side, serge or sew the raw edge along the side, through all the layers when you get to the folded “pocket” area, across the top edge, and back down the other side to the fold.
To keep your serging from unraveling, you can either pull the loose threads and tie them, or serge over them again – kind of like back-stitching on a sewing machine.
3a. Starting and Finishing a Serged Seam
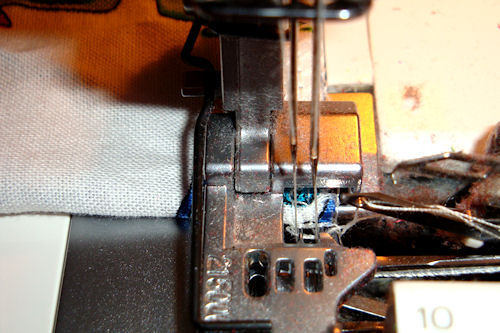 To secure the beginning of a serged seam, start about an inch from the beginning and serge toward the edge.
 Stop when the needles are just over the edge and pull gently on the thread just enough so you can pivot the fabric.
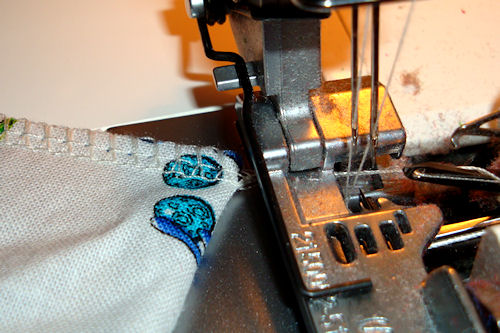
 Realign the fabric so you’re starting at the beginning; headed toward the center of the fabric. Serge as you would normally, stitching over the first inch of serging.
 When you get to the end of your seam repeat the same steps: stop just over the end of the fabric, pull gently, pivot, realign, serge for about an inch before carefully serging off the edge of the fabric.
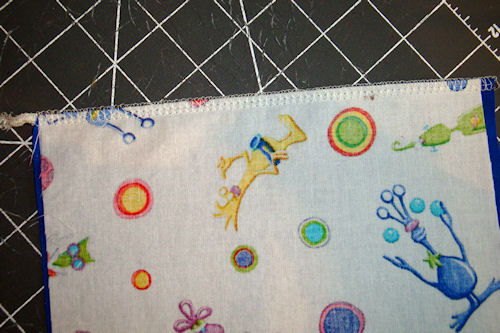
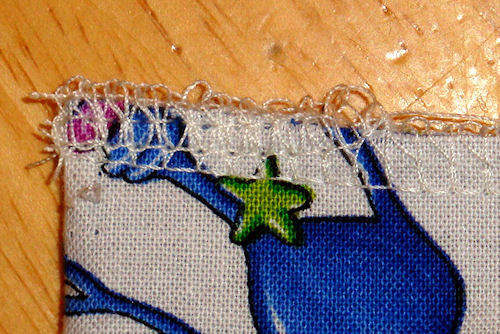
This is what the end of the serged seam looks like. If you look carefully you can see both lines of stitching at the corner.
4. Final Steps
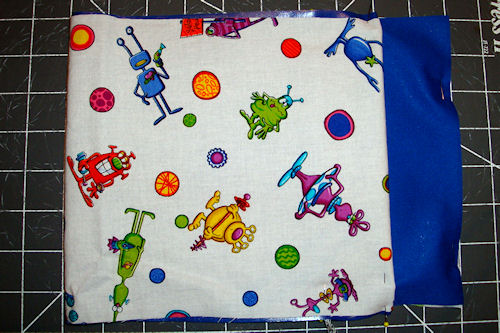
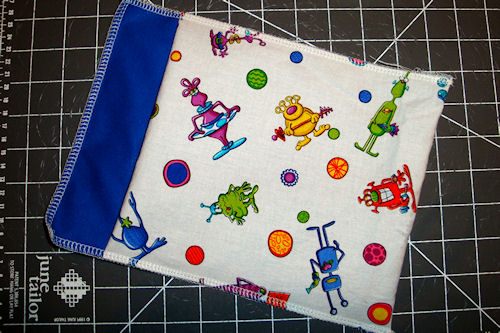 Here is your almost-finished reusable snack bag; just one more step to go.
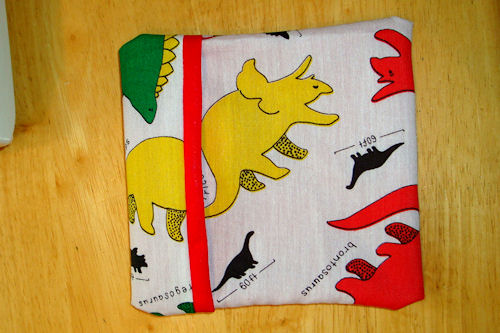
 Turn the bag right-side-in, and you’re done! Ta-da!
Using your Reusable Snack Bag
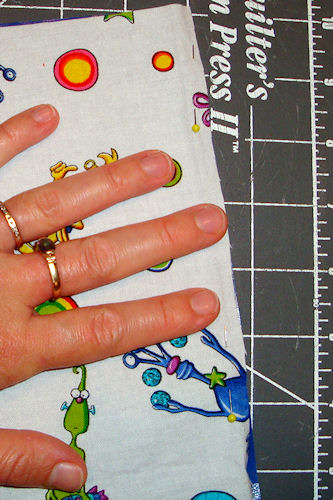
Use your reusable snack bag just like you’d use a plastic sandwich bag: insert food and fold. Here are step-by-step photos for you to follow. I know you’re smart enough to figure it out by yourself but I was taking the photos anyway so I figured I might as well show how to do the folds.
 Obviously you put your food inside the bag first; then fold the long edge into the bag. If your food is close to the opening be sure the first layer covers it, otherwise some may fall out.
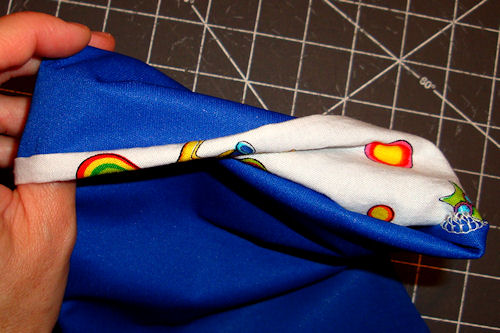 Turn the folded-down “pocket” piece the one with the lining showing over the open edge, kind of like you’re turning it inside out. I hook my thumbs inside each corner then use my middle fingers to push the corners in and around as I flip the “pocket” over, but I couldn’t use both hands to close the bag and take a photo at the same time.
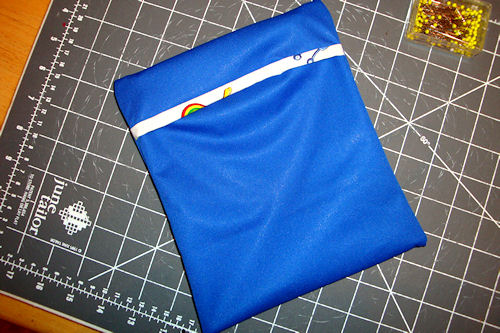 Smooth out the “pocket” so it lies flat, and that’s it!
Now you can see why the first serged seam didn’t line up evenly; the lining creates a nice little decorative accent on the bag.
If you wanted you could add snaps or velcro under the edge of the “pocket” but I’ve never found it necessary. We’ve been using reusable snack bags for almost six months and the only time things fly out is if the first layer isn’t folded over the food. And that one time the boys used a couple of them as bean bags.
 This is one of my experiments: I put the cotton fabric on the outside and the PUL, fabric-side-out on the inside. I don’t like it as well though – I don’t have a good reason, I just don’t.
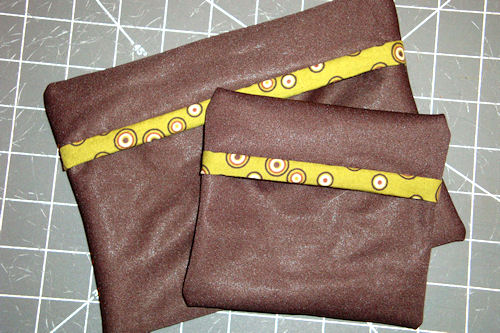 Here’s a set of reusable bags I made for an “Uncloth Basket” my friend Nicole and I donated to WECA for their basket auction last fall. I also made a set of unpaper towels and mesh produce bags for the basket. Nicole made some cloth napkin and reusable shopping bags. I had some photos of the basket but my computer ate them. Naughty computer!
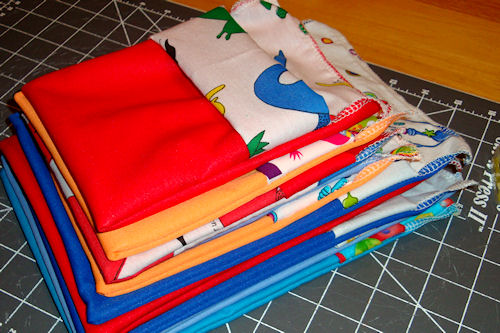
Here’s our stash of reusable snack and sandwich bags. They’re various sizes because I was trying to get as many out of a width of fabric as I could, and because when I’m making something like this for family use I really don’t care if they’re all the same or not.
To clean your reusable bags simply turn them inside out and wash them with your regular laundry. I often just shake any crumbs out and re-use them several times for crackers and other dry foodstuffs before laundering them.
I hope I’ve inspired you to make your own reusable snack bags – or reusable sandwich bags – and when you do be sure to leave a comment and/or send me a photo.
Happy eco-sewing!


Wow, Amy Sue, I love this tutorial!! I am so inspired, I can’t wait to make some of these for my kids. I think there may be a typo, though. At the end of step 1, it says “With wrong sides together, serge the ends of the PUL and cotton together. You may notice…” but in the picture it looks like they are right sides together. Also in step 2, you say to turn it so they are wrong sides together (which implies that they w. Some of us are easily confused, so I thought I’d ask about it. 🙂 Thank you so much for posting this!!
Anne,
Thanks for pointing out the typo, I’ve fixed it now. I’ve also tried to clarify the directions in #2, let me know how I did. 😉 I rarely use patterns anymore so I forget how to word things for others.
Be sure to share photos when you get your kiddos’ snack bags done!
~Amy Sue
gret idea Amy!! I found this while googling “make reusable snack bags” I am going to buy some materials this week and try it out!!! A few people I have seen recommend using an actual ziploc bag on the inside since PUL isn’t FDA approved…what do u think about that? Figured I’d try with one, and see how it held up…obviously it couldnt go in the washer…
Aimee,
It’s up to you to decide what fabrics you’re comfortable using for your snack bags. I’ve seen some with two layers of cotton or a layer of nylon instead of PUL. There’s also a site that shows you how to make waxed cloth with cotton and food grade wax, if you want a waterproof layer that isn’t PUL. (Unfortunately those aren’t washable either.) Personally I’m not too concerned since the cotton is against the food. My mom has always said that “you’ve got to die of something” so why sweat the small stuff. But again, it’s totally up to you what you’re comfortable with. Here’s a discussion on another blog concerning the food-safety aspects of PUL and other similar products.
Thanks for taking time to comment, and be sure to send a photo of your snack bags!
~Amy Sue
Thanks for posting these directions! I am busy making a bunch with cotton print outer and nylon inner, for lunches! Soooo easy to make and super cute and functional! Thanks a bunch!
Rachele,
You’re very welcome! I need to make more for this school year cuz ours have disappeared somewhere – probably wherever stray socks go. Let me know how yours turn out!
~Amy Sue
This is a great tutorial! I just whipped one up in nothing flat! I used a ripstop nylon as the inside of mine with some cotton scraps I had laying around. I’m going to make a million for Christmas 🙂
Thanks Samantha!
I’ve started using ripstop nylon for mine too. It’s not as cute, but I feel better having the nylon next to my kids’ food.
I’m glad you liked the tutorial. Thanks for taking time to comment!
~Amy Sue
Pingback: Nothing New (in the lunch) | inBetween
so clever! Love the foldover design.
Thanks Priscilla – that means a lot coming from such a talented seamstress. 🙂
~Amy Sue
Love this idea!
Pingback: Reusable Snack Bags | The Pomegranate Chronicles
Just found you and your crafts, thank you so much, I’m having so much fun trying them!
Abby,
Thank YOU for taking time to comment! I’m glad your enjoying my posts – let me know how your projects turn out. 🙂
~Amy Sue
I really enjoyed reading your site. I Liked the way you kept everything simple and with great pictures. I am a visual learner I do better when I see what you are doing. I want to use the clear vinyl I purchased at the cloth department for my inside. I will check to see if it is food safe.
Thank you and God bless you
Deborah,
I’m so glad my tutorials helped you! I’m a visual learner too so I try to keep things simple and well-illustrated. Let me know what you find out about the clear vinyl.
Thanks for commenting!
~Amy Sue
How creative, Amy Sue! Thanks for sharing these! I wish I could pull this off. Wish me luck! 🙂
Thanks Julia!
I’m sure you can do them – they’re not hard! If you don’t have a serger, use a zig-zag stitch on your sewing machine. It won’t be as pretty but they’ll still work. 🙂
Thanks for taking time to comment!
~Amy Sue
Hi there, Amy Sue! Since I found out that I’m pregnant, I have never shaken off that “nesting phase” in me. I just love creating things from scratch for my little bun! I’m thinking that these could also serve as excellent organizing containers for my baby’s cabinet — for socks, mittens, caps, and other baby whatnots. 🙂 Thanks for the brilliant idea!
Rachel,
I’m stuck in nesting/organizing phase too, as well as having perpetual “mommy brain” LOL! What a great idea to use the reusable snack bags for organization – I wouldn’t have thought of it. Thanks for sharing!
~Amy Sue
I stumbled upon your site when I was looking for ideas to use mesh. I was given a huge bag with roll after roll of mesh and no clue what to do with it. After checking out your Mesh Produce bags, love them, I started looking at other ideas. These bags will be awesome in my craft bags as well as for snacks. I don’t carry a traditional pocketbook but I have made a backpack with lots of pockets outside, but never enough inside. These will be great to keep all my stuff organized in there that a busy mom/woman always seems to accumulate. Thanks for the great tutorials.
Cyd
Cyd,
What a fantastic idea! Large bags would be great for beach or wet stuff. If the mesh is dryer-safe you could make a lingerie bag too. Have fun exercising your creativity!
~Amy Sue
These are such a great idea! I have seen many other examples, but these are my favorite!
Thanks for the easy tutorial, I will link this on my blog and Facebook group.
Thanks for the links – I hope the tutorial helps others too. 🙂
Thanks also for commenting!
~Amy Sue
love this !! Have you considered selling these !! I do not sew but would be interesting in buying some if they were affordable all the others for sell online have Velcro !
Sheha,
I have actually thought about it, and have a name and logo all ready. I just haven’t had time to stitch any up yet. If only there were more hours in a day… or I didn’t need to sleep. 😉
Thanks for commenting!
~Amy Sue
Pingback: Summer sewing Tutes that I Love!! « Aznchipmunk's Blog
ADORABLE! Where did you get that precious alien fabric!?
Koki,
Thanks! I picked up the alien fabric in a local quilt shop several years ago. I want to say it’s a Robert Kaufman, but am not 100% sure about that and stupidly cut off the selvedge edge which would have that information on it. Duh!
Thanks for taking time to comment!
~Amy Sue
Pingback: Starting and Finishing a Serged Seam
Pingback: Make a Reusable Sandwich Bag
okay I have never even THOUGHT of making reusable snack bags. But those are really, really cool! I wonder if I can find a cool manly print to send with my husband’s lunches? Which brings me to the next idea… a burrito bag. Hmm… he loves burritos for lunch, but they don’t fit in a snack bag. I bet I could make one like this only more tall and narrow for a burrito. Thanks for the brain candy!
Hey, I just got done with these, they look great! I had an old flag I was able to use for one of my sandwich bags. It looks so cool! Thanks for the tutorial!
Kaleb
Kaleb,
You’re very welcome! I’d love to see a photo of the flag bag – I’ll bet it’s really cool.
Thanks for commenting,
~Amy Sue
Thanks for this post! I just found your blog through a google search I did for unpaper towels. After I read that post, I started wandering through your blog and found this post. I have been wanting a way to make reusable sandwich bags for my family but felt the same way you did. I didn’t like the velcro and snapping options either.
I’m going to have to try these out next week. I’ve got lots of scraps of cotton fabric lying around which would be great to use for these bags!
Thank you for your unique article! Itself (and in fact I almost do not know how to sew) had made amazing nice snack bags! I only have one question – what sewing machine you use and what is good for beginners? Thank you for your reply!
Milena,
I currently have a Husquvarna Viking, but I started out with a basic Kenmore from Sears. I think a basic machine is just fine for beginners – no need to pay for bells and whistles until you’re ready to use them. 😉 I bought my Viking from a Viking dealer, and they have a deal that you can trade up your machine within 12 months, so I started with the basic Viking and traded up every year until I reached the one I have now.
~Amy Sue
Brilliant, can’t wait to try this for my kids’ lunchboxes – so much better than using clingfilm every time.
Alison,
Thanks! My kiddos love them! I let them pick out their own fabric so they’d know which was theirs, and because I wasn’t sure at first that they’d like them. I’d love to see photos of yours when you have them done!
Thanks for commenting – have a fantastic day!
~Amy Sue
This is a great idea. I’m wondering about using old tablecloths for the inside material so its more of a waterproof deal. I’d assume that would be food safe. Any thoughts?
Amanda,
I’m not sure if old tablecloths would be food safe – it would depend on what they’re made of. Some of the older products were made with substances we now know are unsafe so I’d be extra-careful to find out what it’s made of.
Thanks for commenting,
~Amy Sue
This is so helpful. Thank you!
There are so many reasons to use reusable bags, thanks for sharing the important ones.