
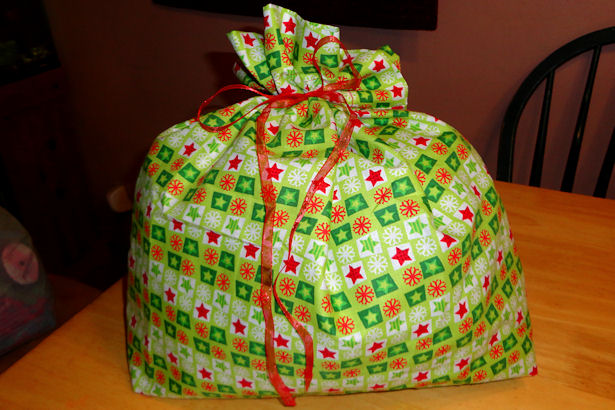
 If you’re looking for ways to “green up” your holidays, cloth gift bags are a great idea! They may not be as much fun to rip open as wrapping paper, but they don’t make as big a mess and can be used again, and again, and again. Besides, it’s so quick and easy to make cloth gift bags that in no time you’ll have gift bags stashed away for every occasion!
Supplies for Making Cloth Gift Bags
One of the advantages of making cloth gift bags is that you don’t need many supplies:
- Sewing machine or serger
- Pins, scissors, etc
- A safety pin
- Iron
- Fabric
- Thread
- Ribbon
How to Make Cloth Gift Bags – Step by Step
I’m not going to give you specific dimensions for the cloth gift bags because I’d rather have you “go green” and use up leftover fabric. Gifts come in all shapes and sizes so just make whatever size bag you can from the fabric you have. If you really need a bag to fit a specific item, measure the item then add a couple of inches to the width for ease and seams, and 4-6″ to the height for the hem.
Ready?
Ok – let’s get sewing!
Step 1: Iron
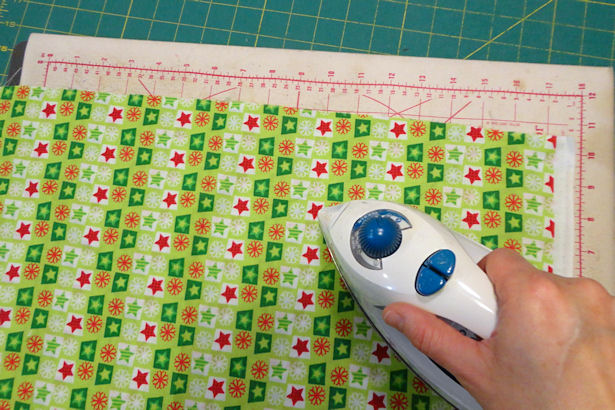 If your fabric is fresh from the fabric store it’s probably ready to go, but if it was stuffed in a bag in a corner of your bedroom like mine was you’ll probably want to iron it before doing anything else.
I didn’t bother washing my fabric ahead of time because I figure the gift bags won’t be washed often, and if they do end up shrinking in the wash it’s really not a big deal.
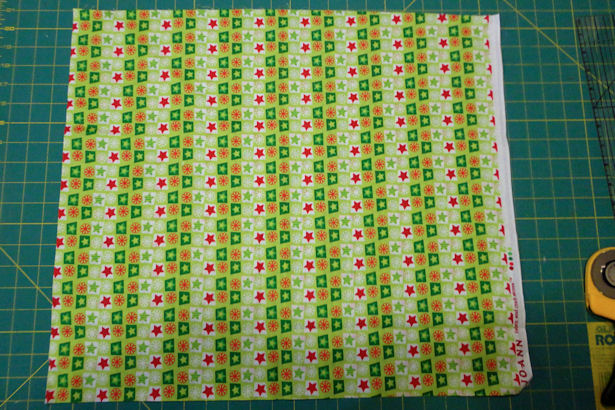
Step 2: Cut
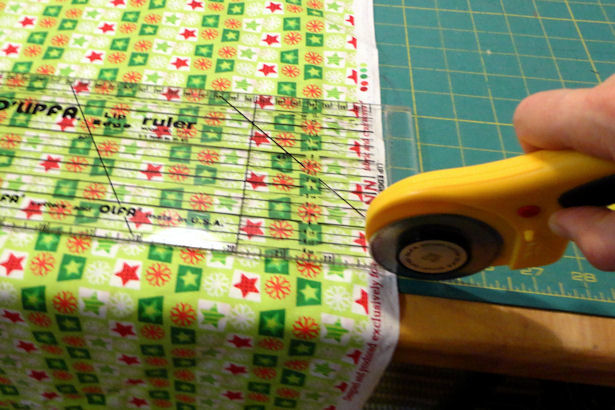 Cut your fabric into the desired dimensions. I cut across the entire length of the fabric and planned to fold it in half to make a medium-ish sized gift bag.
When I use leftover fabric I cut the pieces into the largest square or rectangle I can. Make sure you cut two pieces the same size if the rectangle isn’t big enough to fold in half!
 Make sure you have straight edges and square corners so you don’t end up with a wonky gift bag.
Step 3: Press Top Hem
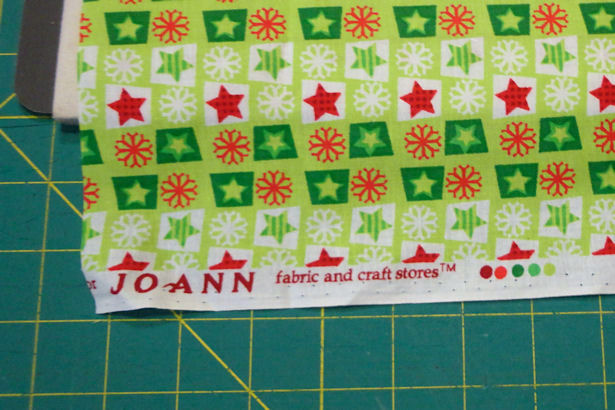 This is what’s called a selvage. It’s the edge on both sides of a length of fabric and doesn’t ravel.
If your fabric has a graphic design like mine that looks nice from any direction, turn your fabric sideways and use the selvage as the top hem to save a little time. Don’t worry if you’ve got Santa or reindeer or something that’ll look weird turned sideways; using the selvage edge is a nice bonus but not necessary.
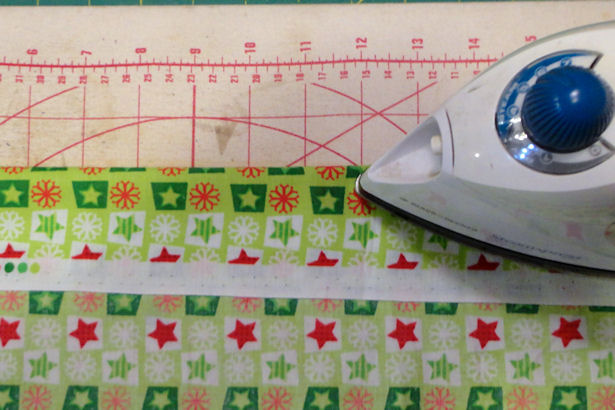 Turn the top and bottom edges over several inches and press. This will be the top hem and the “ruffle” at the top of the bag. I like a decent sized ruffle so I turn my fabric over about 4″ for larger cloth gift bags, and at least 2″ for smaller ones.
 If you’re not using the selvage you’ll need to finish the raw edge of the fabric so it doesn’t ravel. You can serge it, zig-zag it, or simply turn 1/4″ under – like I’ve shown here – and press.
Step 4: Side Seams
 Unfold the edge you just pressed and pin the bag, right sides together, matching the top edges, pressed fold, and sides. Serge or sew.
Yes, you can switch those two steps and serge the bag together before pressing the seam, but I find it easier to press a flat piece of fabric instead of a tube – especially if you’re making smaller gift bags.
Since my fabric is one large rectangle I simply folded it right-sides-together, so the fold was at the bottom, and serged the side seams. If you’ve got two separate pieces of fabric you’ll obviously have to serge or sew from the top down one side, across the bottom, then up the other side.
If you used a sewing machine, either trim the seam with a pinking shears the scissors that cuts VVVVV or with a zig-zag stitch, so they don’t ravel.
Step 6: Stitch Top Hem
 Fold the ironed hem back down and stitch close to the edge. I like to start at a side seam so you can’t see the backstitching as easily.
Optional Square Bottom for Cloth Gift Bags
If you’re making a larger gift bag, like I am, you may want to square the bottom of the bag to add depth so larger items fit better. If you’re making a small gift bag you can skip ahead to the final step.
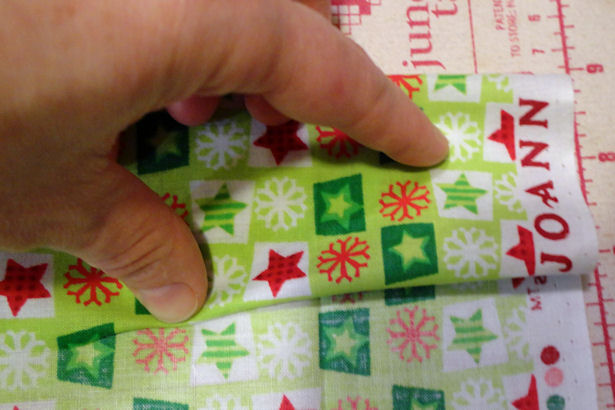
 Find one of the bottom corners of the bag. Open the corner and fold it, right sides together, so the side and bottom seams or bottom fold touch.
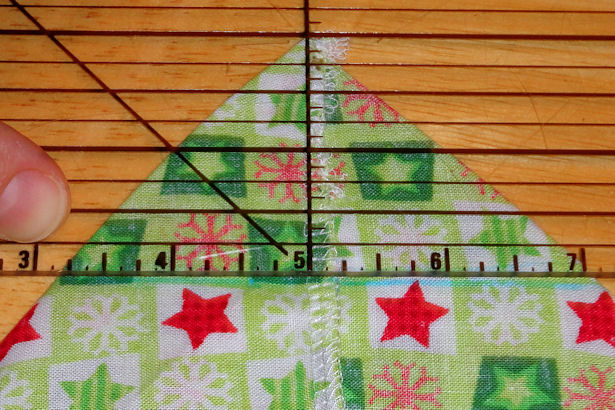 Figure out how wide you want the bottom and draw a line perpendicular to the seam. Keep in mind that the bag will be shorter by the amount you take off the corner.
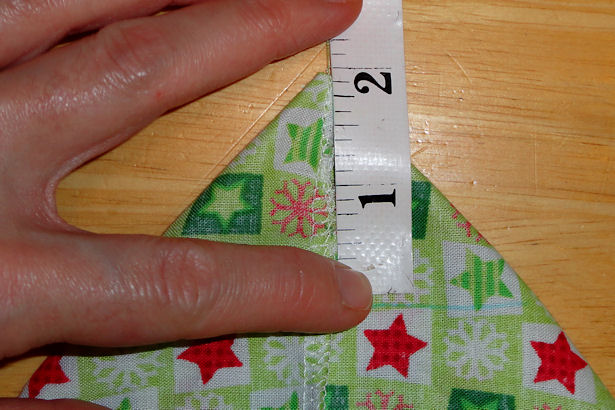 I ended up drawing my line 2″ in from the corner, which gave me a width of about 4″.
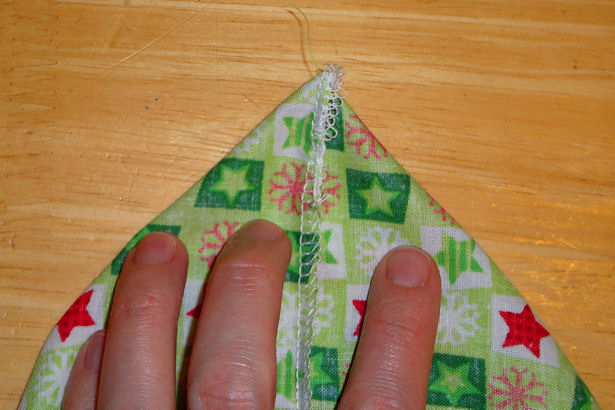
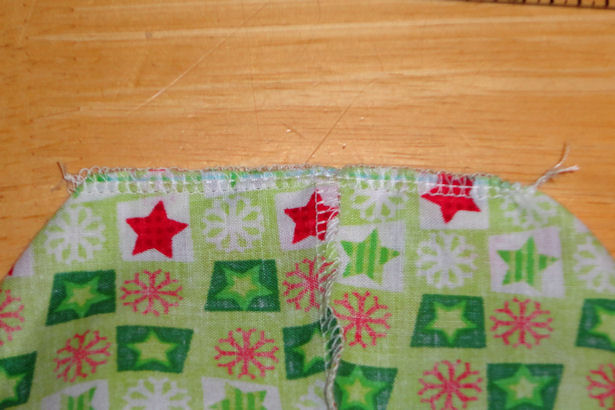 Stitch or serge along the line. Finish the seam with a zig-zag stitch or pinking shears if you’re using a sewing machine.
Turn right-side-out.
 Viola – a square corner!
Finishing the Cloth Gift Bags
Step 7: Attach Ribbon
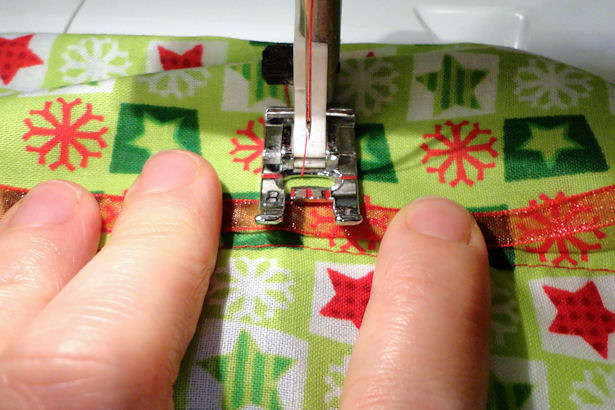 Cut your ribbon twice the width of your bag plus about 6″. Find the center of your ribbon and the center of the front or back of your bag, and stitch the ribbon to the bag.
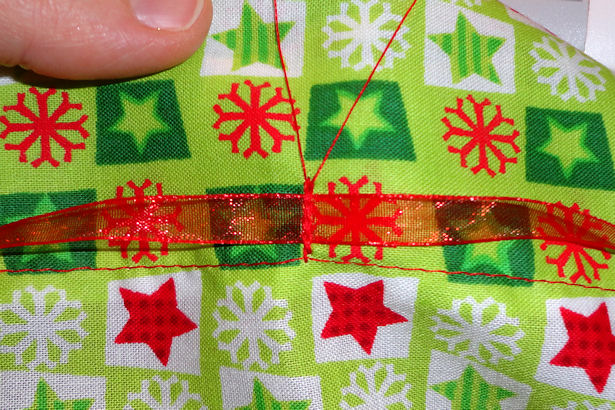 Remember to clip those threads!
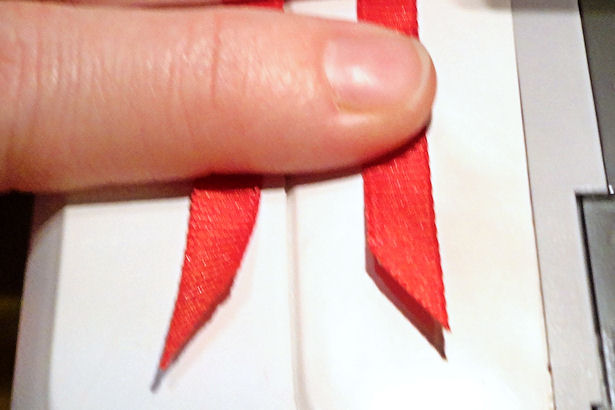 Cut the ends of the ribbon on an angle so they don’t fray. You could also use clear nail polish to seal the ends, but cutting on an angle is quicker and easier.
Step 8: Enjoy
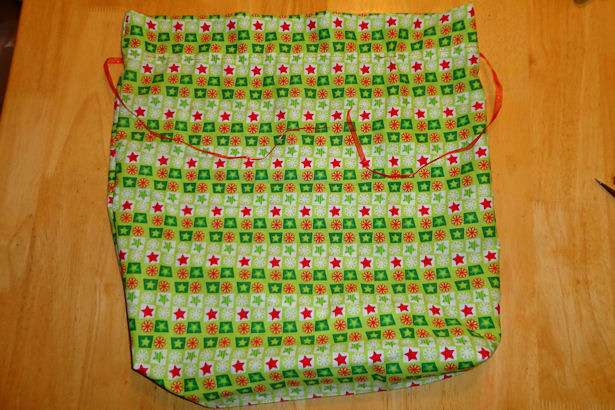 That’s it – you’re done!
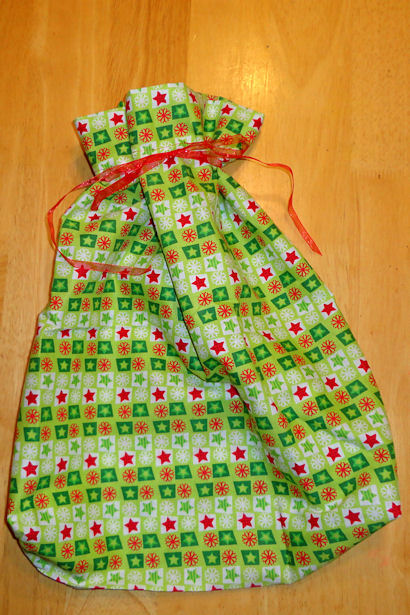 Gather the top of the bag, wrap the ribbon around, and tie in a pretty bow.
You can embellish the ribbon with beads or jingle bells if you like. Unless your beads and jingle bells are all set aside for art projects, like mine…
That was easy, wasn’t it?


Another way to seal the ends of ribbons to keep from fraying (even when cut at an angle): use a lighter and just barely melt the ends. I use that technique to seal the ends of the ribbons I use for hairbows and it works really well. Some of the girls wear the bows over and over again for practices as well as tournaments and they look as good now as they did the day they first got them.
Karen,
That is a great way to seal the ends of ribbons… if you don’t get carried away and set something on fire. I figure it’s safer for me to stay away from the whole fire thing. 😉
~Amy Sue
Pingback: Make Reusable Gift Bags