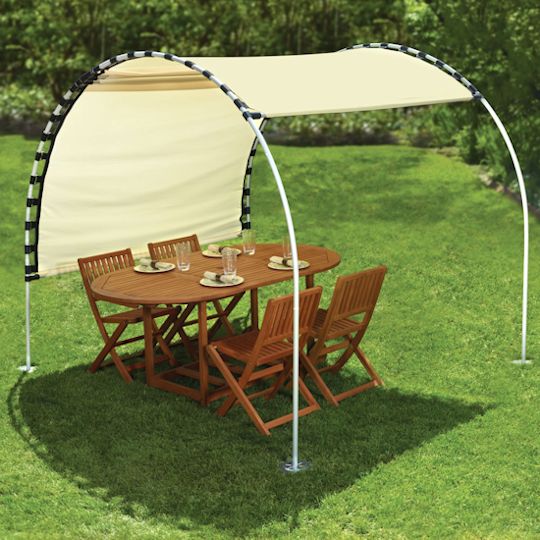
 It all started with an innocent Pinterest pin – a “Suntracking Shelter” that you could move along metal arches as the sun moved across the sky. I thought it would be great for the sandbox because it’s in full sun all afternoon, and normal “flat” canopies don’t help because of the sun’s angle.
Teacher saw the Pin and said “We can make that ourselves; it looks pretty easy.”
And it was.
Mostly.
We didn’t have any directions so we had to figure things out as we went along.
First we had to decide what would hold up the canopy. We compared and contrasted the pros and cons of metal electrical conduit vs plastic PVC pipe, then we debated the pros and cons of an arch vs a square shape. Finally we decided we really preferred the arch shape, and chose PVC pipe – rigid for the “legs” and flexible for the arch. We also bought connectors. The rigid and flexible PVC had different outer dimensions so we couldn’t find connectors that would work on both, but the flexible tubing was just a tad bigger so Teacher planned to sand the extra off with his Dremel tool.
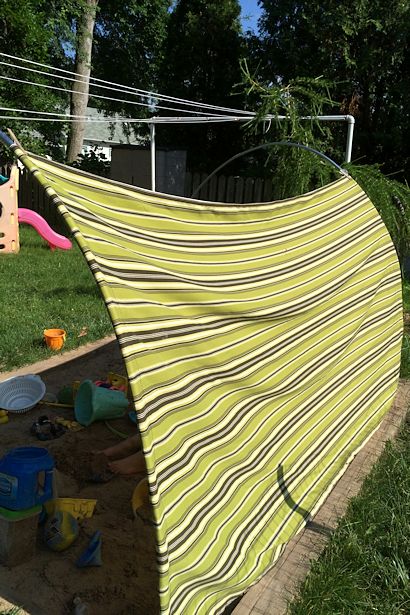 Finding fabric for the outdoor canopy was much easier! We browsed the Outdoor Fabric section of our local fabric store and picked out one we liked. Since the sandbox is 8′ from inner corner to inner corner we bought 3 yards of fabric to make sure there would be enough to make the pockets for the arches.
The fabric canopy itself was super-duper easy to make – the hardest part was making sure my measurements were right! First I folded and topstitched the selvedges under. Sure, it’s an outdoor canopy but I did want it to look nice.
Then I made the pockets for the arches: I loosely measured around the connector, added 1/2″ for ease and hem, and cut the fabric to the right length. Then I measured and drew a line 4′ each way from the center of the fabric, ending up with two lines 8′ apart. I folded the fabric wrong-sides-together on those lines and pressed the fold, folded the raw edges under, pressed and pinned that fold, then I top stitched along the pinned fold to make the pockets. I sewed a second line over the first for reinforcement.
Easy peasy!
Meanwhile, Teacher was working on the harder part of the project – the arches. He cut the rigid PVC into 4 pieces, ground down the outside of the flexible PVC with his Dremel, then connected them with the connectors. They were gorgeous! We tried them out in the sandbox and were SO excited by the perfect arches.
Then I put the fabric on and our ballon burst – the weight of the fabric bent the flexible toward the center of the sandbox.
Back to the drawing board!
 After scrapping the PVC pipe idea we went back to Teacher’s original idea of making the outdoor conduit from electrical conduit. I wasn’t sure how he’d bend it, but I knew he’d figure something out. And of course he did.
He trapped the conduit between our concrete steps and a ten-gallon pail. I stood on the pail so it wouldn’t go flying while he pulled on the conduit, using the curve of the pail create an arch. It worked like a charm.
My man is a genius!
To get two similar arches we taped the flexible PVC to the driveway with the ends 8′ apart and used it as a pattern. We laid the conduit over the PVC periodically to compare, and made adjustments as needed. The finished arches weren’t perfect, but they were pretty darn close!
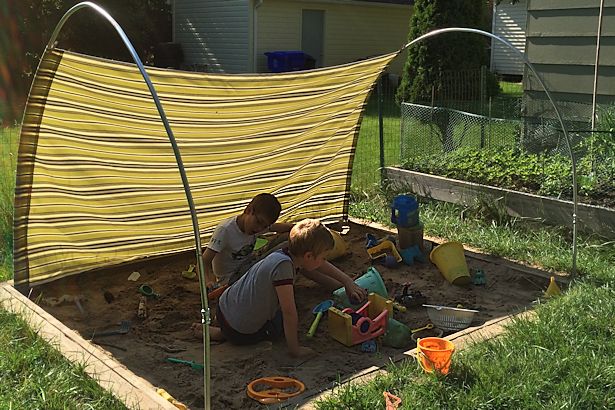
 We tried the arches out in the sandbox and burst another balloon – they were so short that the children couldn’t stand up in the sandbox.
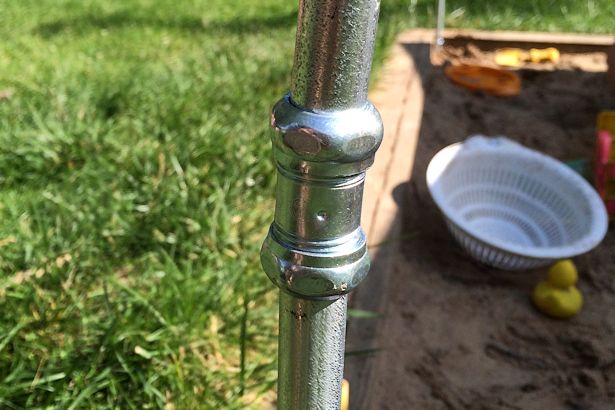
Luckily that was easy to fix! We bought a 10′ length of conduit and compression connectors. Teacher cut the conduit into fourths then connected them to the arches with compression connectors.
Easy peasy!
 We slid the fabric canopy on the conduit arches and drafted the boys to help us hold the whole contraption up in the sandbox. It was perfect!
The boys dug deep holes into the corners of the sandbox and we were ready to put up the outdoor canopy. I couldn’t wait to see it completely done!
We sunk the “legs” deep into the sand, then Teacher screwed a conduit strap into each corner board to support the canopy. The legs should pull out for winter, and in the meantime we can push the fabric canopy all the way down to the ground when there are high winds.
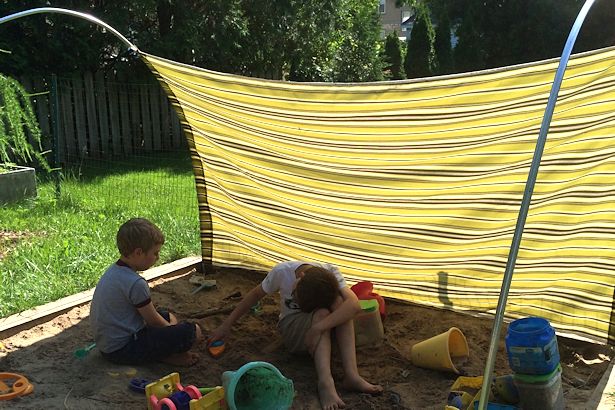 I think the outdoor canopy turned out great, and so do the boys. I can’t wait for the child care children to see it!

Photo credit: Hammacher Schlemmer




Pingback: How To Create Outdoor Shade: A Round-up Of 22 Ideas - news from Allwebsolutions.net
Now that’s just brilliant. I’ll be sharing this on my networks including reddit. I bet those folks love it! Very unique and creative. Thanks!
Nancy
Pingback: 20 Super Cool DIY PVC Pipe Projects Worth Realizing - Homesthetics - Inspiring ideas for your home.
Pingback: 20 Super Coole DIY-PVC-Rohr Projekte Realisieren – Houzz Ideen
Pingback: Love it! DIY Adjustable Sun Tracking Canopy - DIY Health Tips
Pingback: DIY Adjustable Sun Tracking Canopy - Creativity Explosion - DIY & crafts, food, tips & hacks, health, reuse & recycle, fashion & beauty
Pingback: DIY Adjustable Sun Tracking Canopy For Your Backyard • How to
Pingback: 15 Ways You Can Use PVS Pipes Differently – Children Edition
I wonder if the interconnecting poles from the instant setup tents and a bed sheet could be used for this project?
I’ll bet they could! If you try it, be sure to send me a photo!
~Amy Sue
Looks great and a winning solution for a sand box! If you want to reconsider the PVC version, I see in the photo of the “store-bought ” version that there are 3 straight cross members going from arch to arch. With a oversized Tee connectors, they slide over the arch tubes and keep the arches from bowing toward the center. They also keep the frame from collapsing when a child pulls/climbs on the fabric. [If I start yammering about PVC or pool noodles over the exposed metal conduit, I’ll have wandered into plain ‘ol Meddling.]
B^)
Bruce,
Thanks for your thoughts! So far no-one has climbed or pulled on the fabric so I’m not worried about that. I considered padding the conduit, but the connectors aren’t sharp so it’s not a concern. As for banging into it, my philosophy is that it’s better for children to experience little hurts when they’re young rather than big hurts when they’re older. 🙂
I’ll look into the Tee connectors – thanks for the tip!
~Amy Sue
Pingback: 15 creative ways to use PVC pipe at home and in the garden - Czaal is a source for latest happening around the world.
Pingback: 15 Ways You Can Use PVS Pipes Differently – Children Edition – Happy People
Pingback: 20 Useful DIY PVC Projects – Simple DIYs
Pingback: 35+ Fun & Easy PVC Pipe DIY Projects For Kids To Do This Summer
Pingback: DIY PVC Pipe projects You Can Make Easily • DIY & Crafts
Pingback: A Dozen Terrific DIY Kids Toys Using PVC Tube – LittleProjectforKid
Pingback: 10 Exciting DIY Ideas to Build a Shady Space for Patio – HomeDesignInspired
Pingback: 10 Simple PVC Pipe Crafts for Kids of All Ages –
Pingback: Top 35 Diy Outdoor Canopy Tent - Best DIY Ideas and Craft Collections